

When you’re building a new guitar or even a kit, the neck position is not always marked for you in advance. Since the neck position may have shifted through your build things may not be obvious and if the bridge is not located properly or within the adjustment tolerance. You will never have correct intonation.
Where should the bridge be positioned?
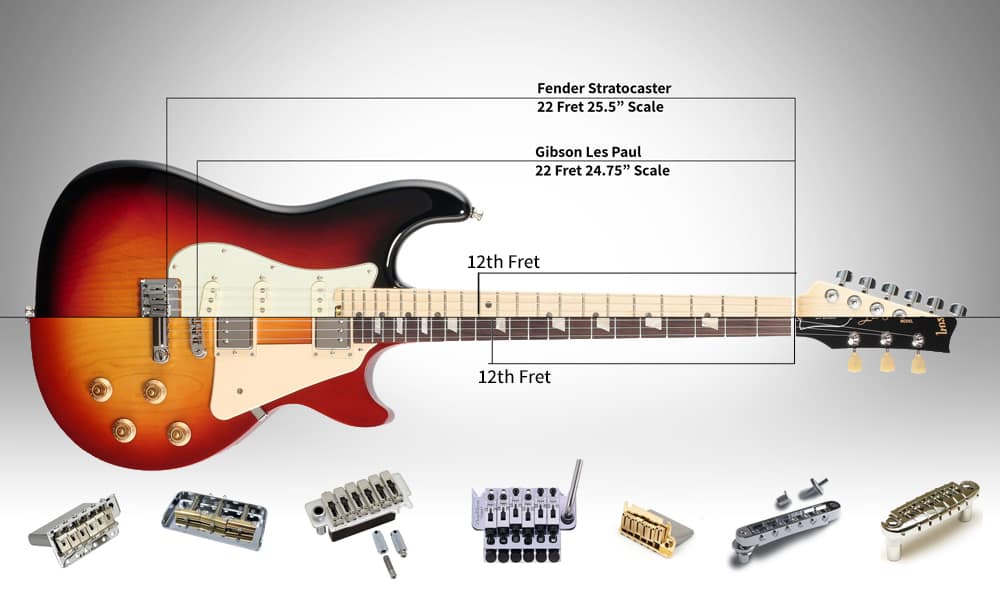
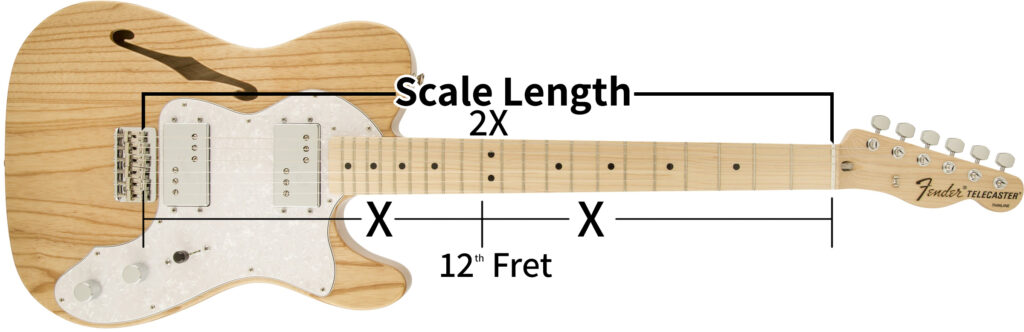
On pretty much every guitar the bridge should be located so that the break point of the string will be exactly at the distance of the scale length, from the nut. The scale length of any guitar is defined as double the distance from the nut to the 12th fret.
The definition of scale length
Since the definition derives from the position of the 12th fret, and the length from the nut to it, the total scale length will determine the position of the bridge and not be determined by it. Whether you build the neck yourself, if you bought a pre-freted one, or its’ the one that came with a kit, measuring the distance from the inside edge of the nut to the middle of the 12th fret and then doubling that distance will give you the exact scale length.
How far should the bridge be from the 12th fret?
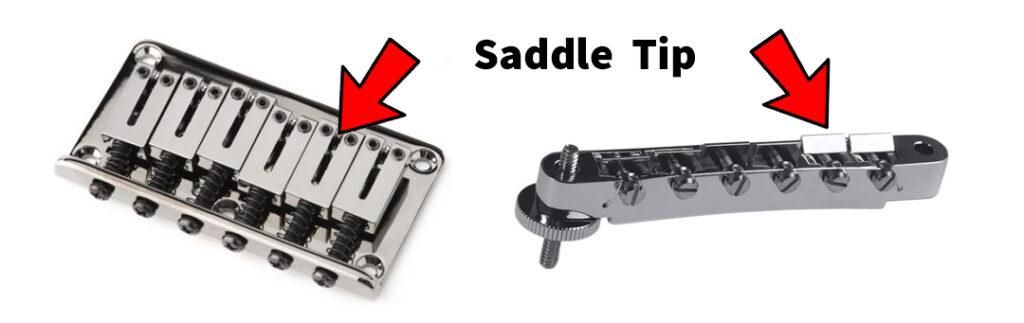
The bridge, or the point where the string leaves the bridge, will be at the same distance as the nut is from the 12th fret, on the other side. This will be a little different from the bridge to bridge, depending on type of saddle it has.
You should also take into account the amount the amount of travel and adjustment the saddles have, and have them positioned somewhere in the middle so that they have room for adjustment either way.
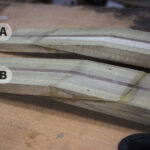
How to position the bridge/ saddles on a multiscale guitar?
Multiscale guitar will usually have a cascading bridge with individual. The simplest way to make out the position of each of the single saddles that make up the bridge is to measure the distance to the 12th fret on the low E string, double the distance and find the position of that saddle. Next do the same for the high E string. Make sure you measure along the string line and not the edge of the fretboard (there is a significant difference in multiscale fretboards). Now that you have the two extremes, all you need to do is create a straight line between the two and mark the other four.
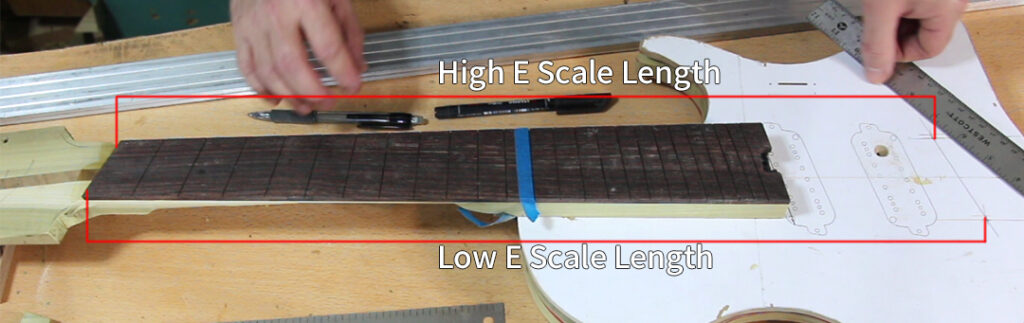
Like any other bridge the individual saddles should default around the middle of their travel and may need fine tuning for intonation, after stringing, but this way you will be in the ball park and look good.
How should a guitar bridge be set?
Each type of bridge will have a specific way of mounting and that will directly affect the way they are adjusted and set.
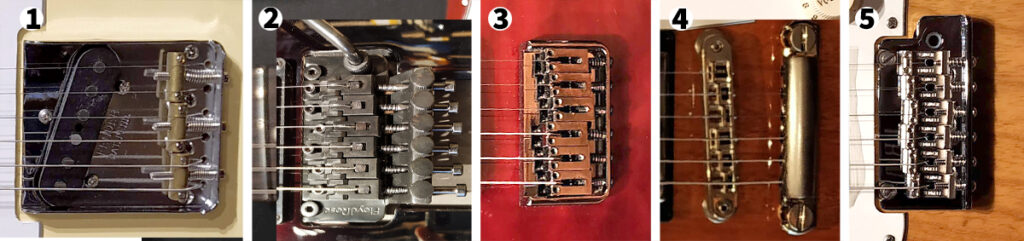
These Hard-tail bridges will have a few static mounting screw.
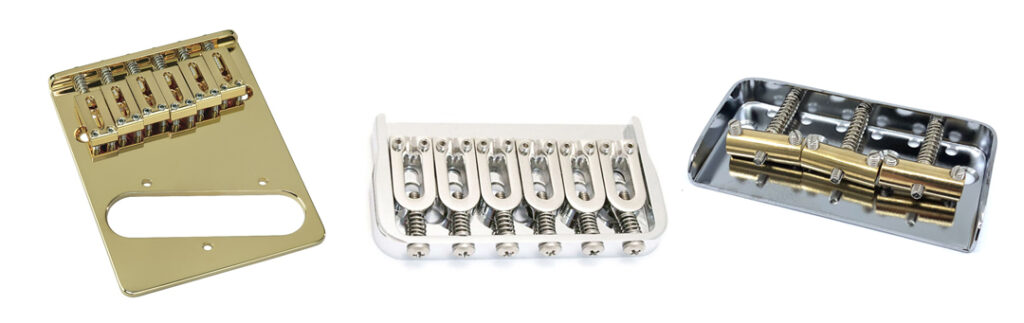
They will usually have the saddles adjusted from the back with one screw per saddle. The saddles may need to be removed for screwing the bridge to the body and after assembly should be brought to the middle (or 2/3 of the way forward) of their travel. This is the position where they should match the scale length. This is also the point where you will want to start the intonation adjustment after stringing the guitar and going through the initial setup.
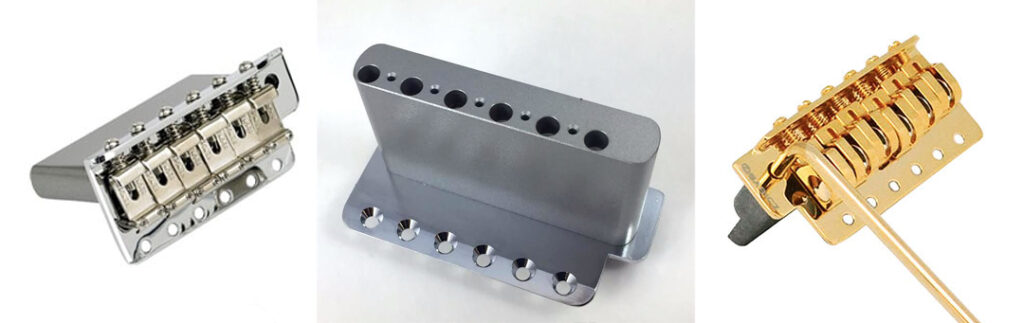
Original Vintage Strat Bridges as well as aftermarket ones still use a 6 screw row to attach in the front side of the bridge. These screws are not tightened all the way and act as a hinge for the tremolo. The saddles and the adjustment are set and refined the same way as hardtail and Telecasters with a screw at the back. Here too, you want the neutral starting point to be a bit back from the front-most position of the saddle.
See how to install and set a Fender Strat tremolo from the pros:
More modern style tremolos including Fenders, Gotoh’s, Hipshot and of course Floyde Rose, all use mounting studs to act as both anchors and hinges. These will usually be a pair which will be mounted to the body at the front side of the bridge. Unless you are talking about a direct replacement, they will each have their own diameter and threading.
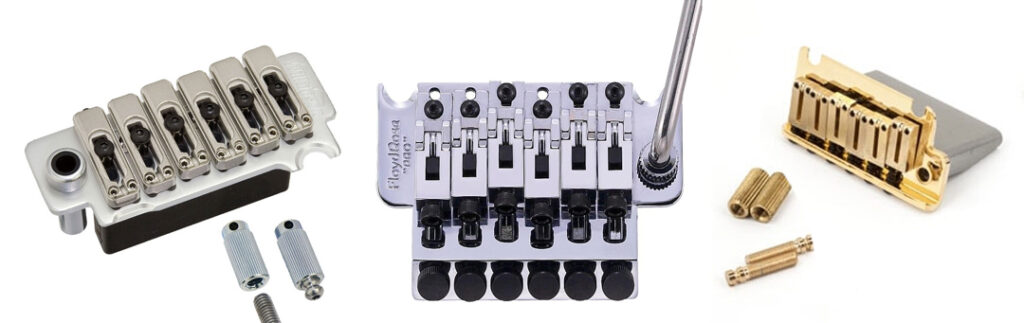
Some will have both, but also be aware of metric vs imperial measurements, depending on the origin of the guitar and the bridge. Regardless of the complexity of the bridge (and some of these can get very complex) the point to which you will refer to as far as positioning will still be the saddles themselves.
The TunOmatics and their aftermarket counterparts all have a distinctive shape and mounting studs. These will include the classic Nashville or ‘Historic Spec ABR-1’’ and also versions by Schaller, Graph Tech, Gotoh, and more. Unlike the floating tremolos, the posts on which these are mounted have the thumbwheel height adjustment as part of the stud and not the saddles.
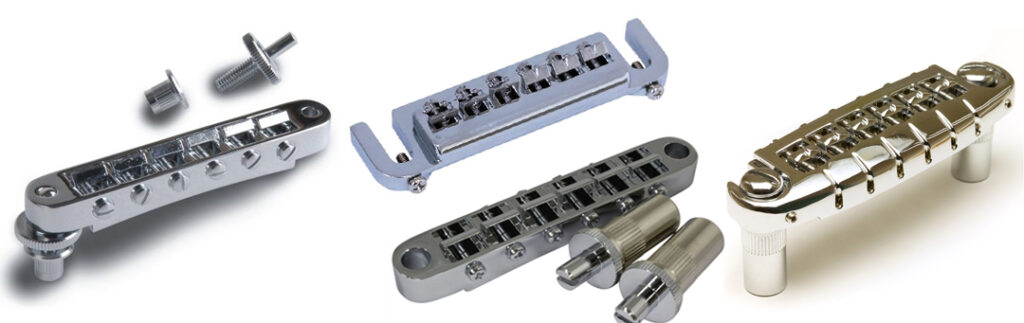
These will usually also end up with much higher string positioning warranting an angled neck, typical of most Gibsons. The saddles in this style of the bridge will be blade-like and notched (or un-notched for customization). The travel on these will usually be a bit shorter than the for-style saddles and there are two ways in which that can be helped. The first is the ability to flip them so that the ‘blade’ can be at the front or back of the bridge, and gain its own thickness to the travel distance. The second has to do with compensation and mounting the whole bridge at a bit of an angle.
What is string compensation
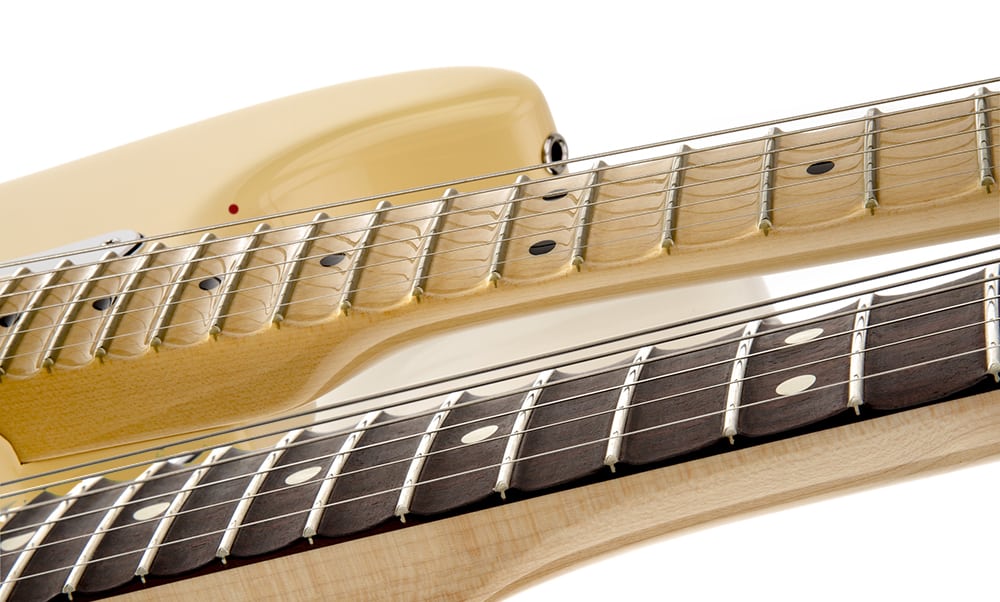
Strings with different thicknesses will intonate differently and that is why “scale length as being twice the length of the distance from the nut to the 12th fret” is our starting point, and why bridges have adjustments. If you look at the image of these different bridges after they have been adjusted, you can see a clear trend of the saddles being adjusted backward more for the thicker strings.
There is a slight difference between the unwound and the wound strings, but the thicker ones do seem to require a bit more length to properly intonate. That is called compensation, and it exists to make up for the material stiffness of the string itself, and the more pronounced it is, the thicker it gets. Gibson Tun-Omatic bridges are actually mounted at a bit of an angle to accommodate this exact phenomenon. The lower E string side post of Tun-Omatic bridges will typically be drilled and positioned 1/16”-1/8” further back than the actual scale length or the other post. This will make up for the relatively short travel of the Tun-Omatic saddles.

Which side of the guitar bridge should be higher?
This has to do with both mounting and set up. Other than Tun-Omatic style and some Floyd Roses bridges, which can have the height of the whole bridge adjusted with a key or thumbwheel, most bridges are flat and parallel to the body. The height adjustment will actually be done on the individual saddles. There are a few general guidelines for setting up the height of the strings/ saddles at the bridge. The thicker strings will often need more room to vibrate without buzzing. You will set the High E and the low E strings as low as you want or can without buzzing. You will then adjust the four middle strings to match the radius of the fretboard and the height of the first and last strings. Chances are, the Low E string side will be a little higher. On a Tun-Omatic bridge the height will be set by the thumbwheel, and once the Low and high E’s are set, the radius is already set. If the Tun-Omatic bridge is not an original that came with the guitar (or kit), make sure the radius matches the fretboard, otherwise you will need to compensate by slotting the saddles themselves to match.
How do you measure fret spacing on a guitar?
There is a mathematical formula to calculate the distance and spacing of the frets, but the easier way is to use one of many fret calculators. You can also download and print (it’s handy when fretting) a full chart for most of the common scale lengths from my download page