
Multi-scaled guitars are becoming more and more popular and in the last few years have appeared as part of the line of major manufacturers as well as many smaller custom guitar makers. Aspiring Luthiers and weekend guitar builders often shy away from it for the perceived complexity.
The fanned fretted fingerboard can be fretted following a few basic principles:
- Selecting two scale lengths, one for the lowest string (E for a standard tuning six string) and one for the High E string.
- Deciding at which fret will be the neutral or straight one
- Accurately marking the fret position on the respective top and bottom string line and not on the edges or centerline as standard fretboards.
- Marking and cutting the slots with a fret slotting saw
In the following article I will break these principles into smaller actionable steps, which will take the mystery out of the process and enable even novice builders to tackle the multi scaled fingerboard. Considering, most hobbyist builders do most of the work manually anyway, the amount of work and complexity is not that much greater. But before we get into the choices we need to make, we should understand the why.
What are the benefits of the multi-scaled fretboard?
Aside from the unique ‘cool’ look, the multi-scale guitar AKA ‘Fanned fret’ has two main benefits:
The first is ergonomic. Moving up and down the neck requires some wrist adjustment in order to be able to play and barre properly. If you try and keep your wrist locked and have the motion extend from the shoulder, you will notice your index finger pointing outwards, the closer you get to the nut, and inwards the closer you get to the body.

Notice how many guitarists tend to lift and their guitar to an extreme angle, which, aside from theatrics, gives more comfortable access to the higher tones. Try barring a full chord anywhere above the twelfth fret and you would wish those frets were angled. The fanned frets mimic those angles and will allow playing with less strain on the wrist.
The second benefit is tonal. Thicker and longer strings sound and intonate better for lower tones. This is the reason why a bass guitar is longer and why a Cello and contrabass are even longer, with even thicker strings. On the other side of the tonal range, the thinner strings will lend themselves to easier bends with shorter scales which will require less tension. Other stringed instrument such as harps and pianos have always been built with this concept in mind and the difference in string length as well as thickness inherent to their shape and construction.
How do you decide on which scale lengths to use?
The principle is actually very simple: you pick a longer scale length for the lower E string (with standard guitar tuning) and a shorter scale for the high E.
The comfortable medium
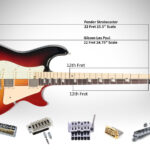
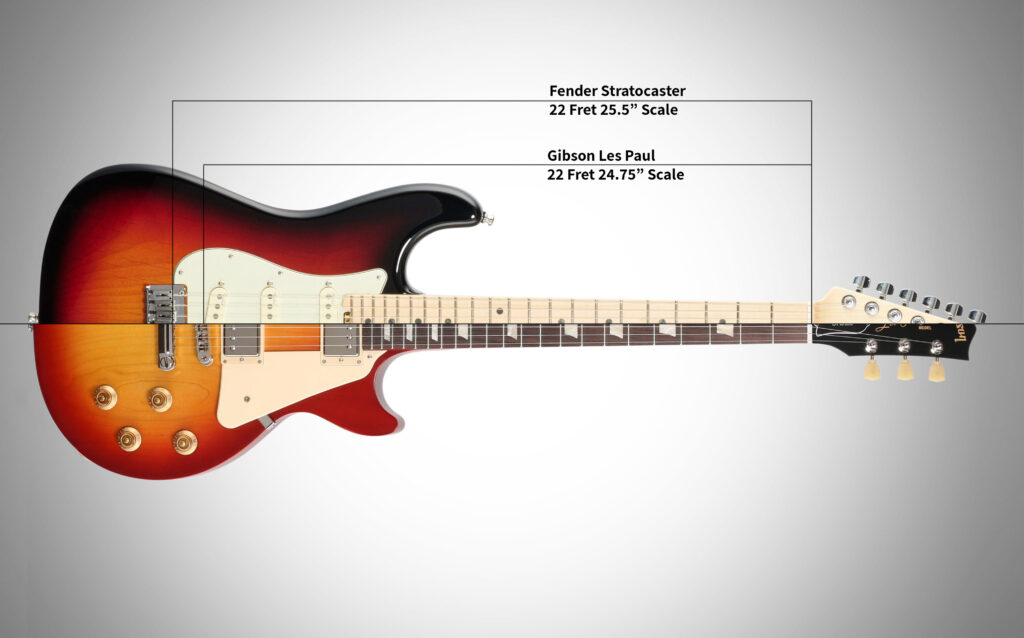
Most guitars live in the comfort zone between the 24 ¾” Gibson’s use, and the 25.5” of typical Fenders. The very obvious choice here for the low E, would be a 25.5” (648cm) just like the typical Fender scale, and the 24 3\4” (628mm) scale, typical Gibson) for the High E. This type of multiscale will probably be comfortable for most players and take very little time to get used to,
The extreme lows
But, you can push it a bit more and choose a longer scale for the lower tones. You can try 26” or even 26.5” which is 673mm and is already within what is considered baritone territory. This may also require you to use slightly heavier gauge strings, but should definitely give a noticeable difference.
Pushing the highs
For the high E, you can choose the 24 3\4” scale or even a more moderate 25” like PRS guitars, but again, you can push it towards the 24.5. This will enable extreme string bending even with the thinnest of strings.
Of course the bigger the delta the more pronounced the look. As far as comfort, it is very subjective and where moderate ‘fanning’ of the frets should feel very intuitive, it may start to be uncomfortable at some point.
What about ‘Tuning Down’ my Low E?
If you like tuning your lower E string, you will appreciate the longer scale even more. When tuning a normal (25.5”) E down to D or lower to C and B, will make the string looser to the point where it will become uncomfortable to play, buzz and lose all sustain. The so called ‘Spaghetti Syndrome’ can be avoided with a multiscale fingerboard. The longer scale will enable keeping it tighter and with moderately thicker strings sound and feel very natural.
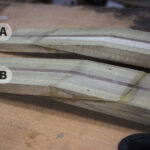
Onto the Bench
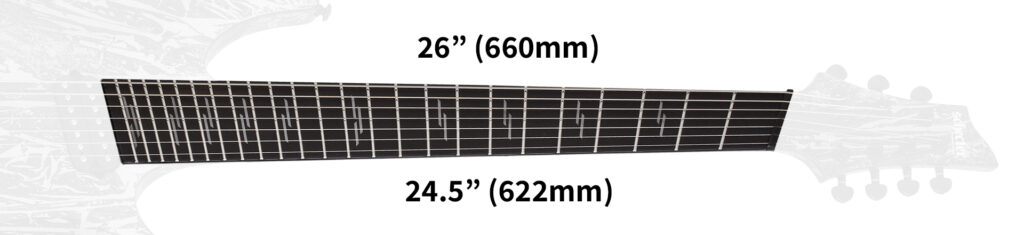
I decided to go with a low 26” which are a 660mm scale, and 24.5” or 622mm. This gives a 1.5” or 38mm difference and will look AWSOME. Personally, I do like to experiment and push my boundaries, but the following method will work just as well with moderate scale lengths.
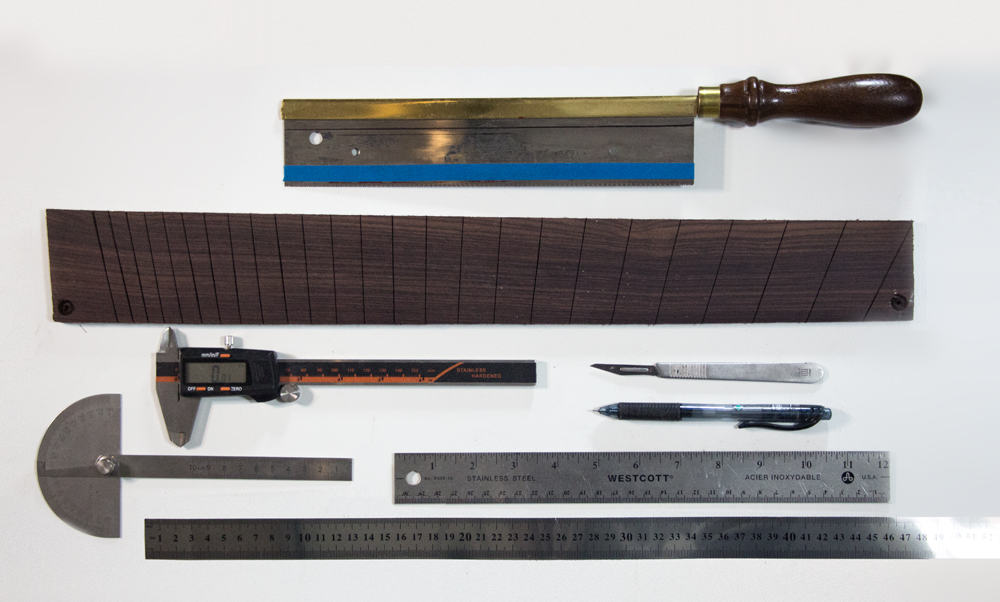
The Tools to make a Multi-Scaled Fretboard
The tools are the same as any ‘normal’ handmade fretboard. We need a neck blank, a long ruler, a straight edge if your ruler isn’t sturdy enough, a short ruler, calipers (preferably digital), a good sharp pencil and a sharp blade. A surgical scalpel is my blade of choice.
The 10 Steps
I broke down the basic principles to 10 more actionable, comprehensive steps:
- Mark the centerline, the High E and the low E string.
- Starting from the nut, mark the ‘Offset’ position of the frets of the longer scale length on the lower E string line. That’s 660mm for me
- Measure again (this one is only if you want to be accurate) this time I measure the ‘Delta’ with digital calipers and mark with the scalpel on top of the pencil.
- Decide on the Neutral fret position and mark the position of the 0 fret on the high E string (this is really the trickiest part)
- Starting from there, mark the ‘Offset’ position of the frets of the shorter scale length on the high E string line.
- Again, measure the ‘Delta’ with digital calipers and mark with the scalpel on top of the pencil.
- Connect the dots and draw the slots with the pencil.
- Scribe the slots with the scalpel
- , Mark the slots a second time with a thicker blade, to really make it easy for the slotting saw to stay its course. (Optional)
- Cut the slots

From Theory to Practice
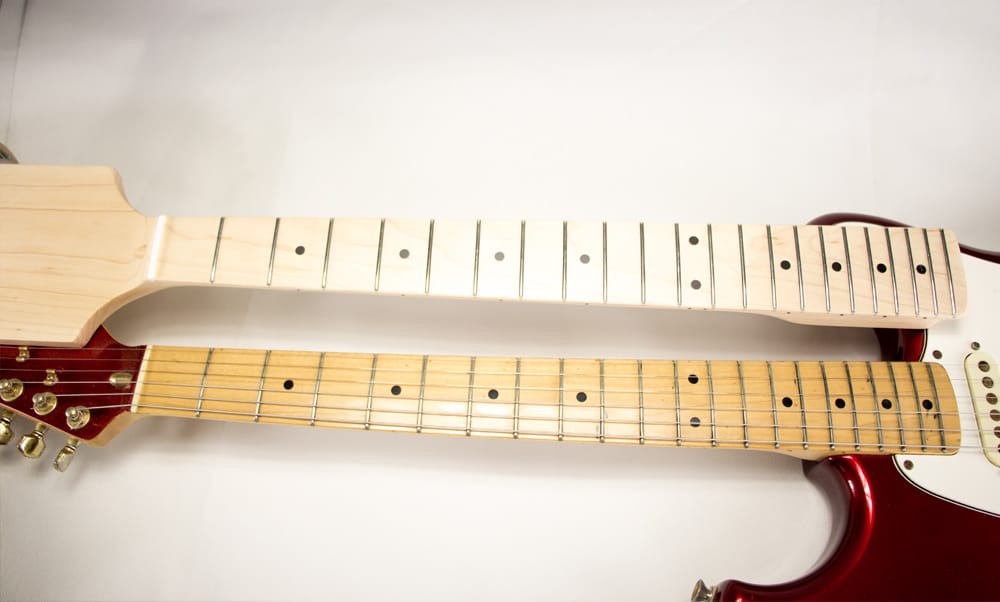
With all the marking, I prefer a smooth surface, so I will start with just sanding the fingerboard. Fingerboards are often, as the Indian rosewood, dark and make marking much harder to see, especially on camera. (See video below). Since I am going to sand and radius it anyway, why not make my life easier, and just paint it white?
Marking the centerline and Strings
A few hours later, when it’s dry I start marking. This fretboard is not exactly square so I will just measure the midpoint on either side and make my centerline. The scale length should be measured on the line of the string itself and not the edge of the neck so I will calculate the 42.6mm (Standard Fender size) at the nut divided by 2 and subtract 3.2mm or 1/8” from the edge to get to the string position itself. The same for the other edge. At the heel where the 22nd fret would be It will be 56mm and I will also again subtract 3.2 mm from the edge and mark the string position.

I will have to work out the exact spacing and angles of the rest of the strings when I deal with the nut, but for now that’s all the math we need. The rest will be calculated.
Using A Fret Calculator (or Printing a Table)
At this point you want to have your scale calculator or table handy. If you want the more standard Fender Gibson or PRS scales, you can download them from my DOWNLOADS page, but you can also install one of several calculators available for free. So I have my list in front of me, from a little app called ‘Fret Calculator’. It’s just handy having it on my phone next to me.
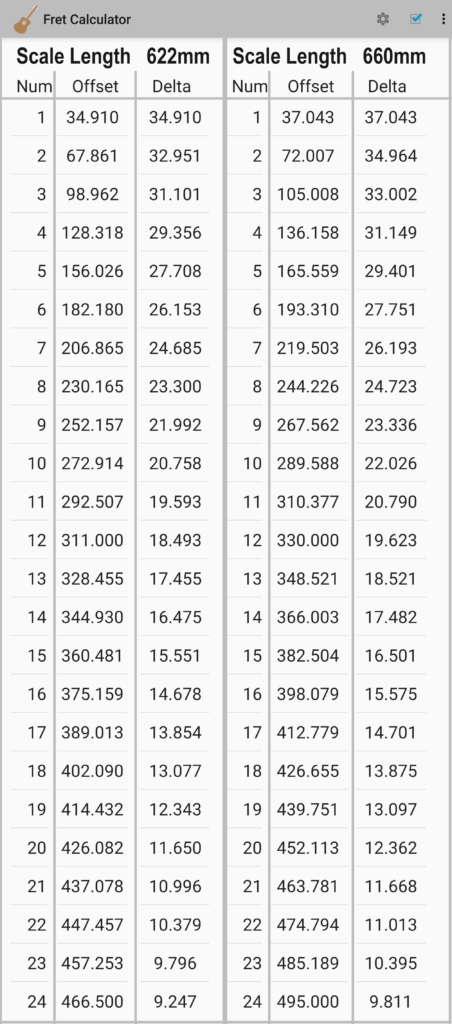
I am going with metric here so apologies to the imperial builders, however the process would be the same
Marking The ‘Offset’ position of the Lower E String
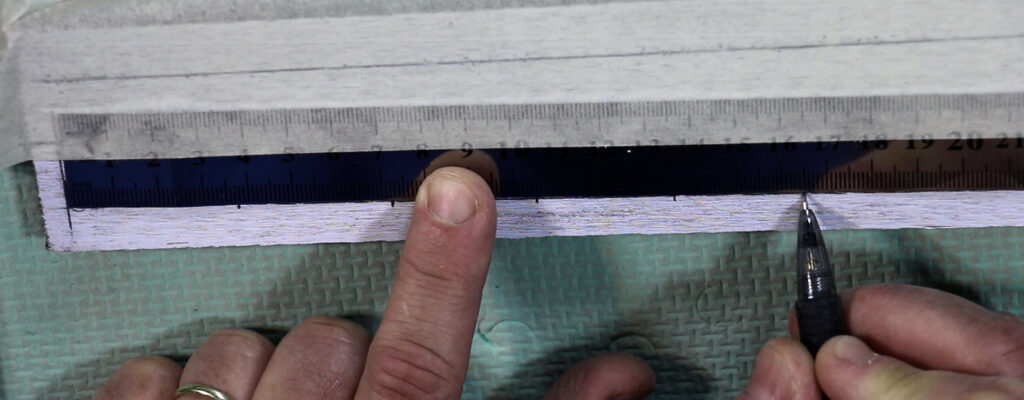
I have taped a ruler to the fretboard and I am starting to mark my 660 scale on the first, low E string. I always measure the offset from the nut first, this way, even if I make a mistake, it will only affect the one fret and not compound the mistake to all the following ones.
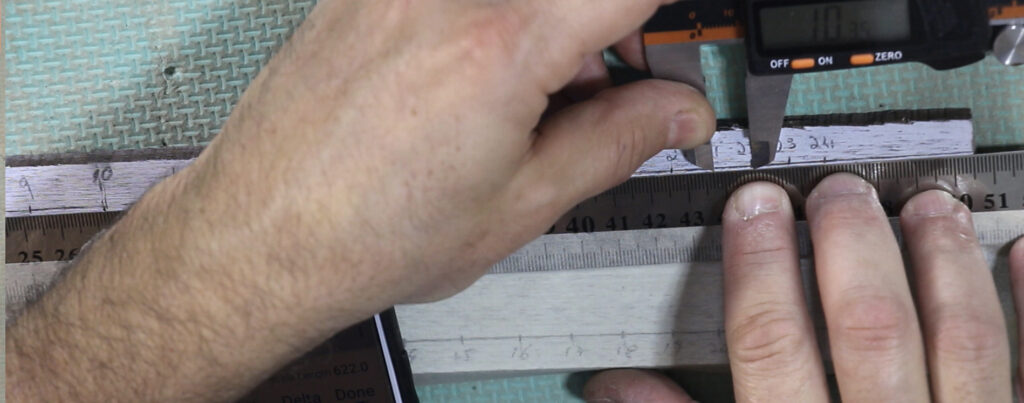
Marking The ‘Delta’ position of the Lower E String
Using the second method with a caliper and the delta, on the second round, should help me
- Catch any discrepancies of the first measurement
- Get a more precise location with the digital calipers and the scalpel blade
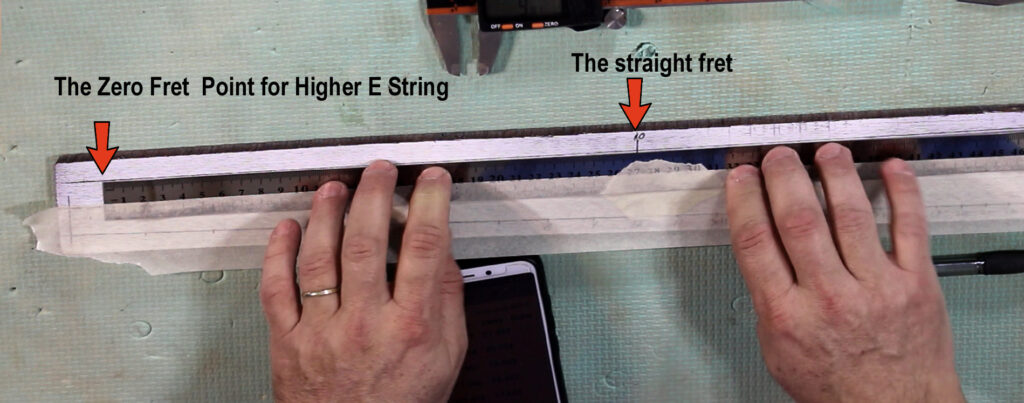
Deciding where the Neutral fret goes
Once both measurements are marked it is time to decide on where the neutral, or straight fret is going to be. There is no hard-fast rule here but it should be somewhere in the middle to not make any of the extremes uncomfortable to play. Stranberg, who use fanned fretted necks as a standard put, the straight one anywhere from the zero fret (the nut) and the 12th. It really depends on personal preference and the extremity of the angle you want to deal with. If you are making the guitar for a specific person you may want to consider how they hold the guitar, which may change the angle of their hand, a guitar held high like classic Spanish players may require a very different angle than someone who plays is down low. After playing around with it, I decide to go with fret number 10. I use a straight angle ruler and mark the position on the High E string directly opposite the low E. This is my point of reference for this string. At this point I turn back to my scale charts and this time I go to the shorter 622mm. I find the distance to the nut or zero fret, and mark it. This is my Zero Fret Point for the higher E string.
Marking The ‘Offset’ position of the Higher E String
Now I just start from here and mark all along the High E string just as I did with the low one, but of course use the shorter scale chart.
Marking The ‘Delta’ position of the Higher E String
When I get to the 24th , I will go back and measure again but this time with the ‘Delta’ column in my chart and using the caliper and the scalpel. There is no way I will not find slight differences in the second round, so it’s always worth it… I also like to write the fret numbers, to stay oriented in the repetitive action.
I don’t think I can or need to stress the importance of accuracy her, and if you find it too tedious, well, I don’t know, buy a pre-fretted neck.
Drawing the Frets to finally see what it looks like
When both sides are marked and scribed with the scalpel, I take the smaller ruler and mark all the frets with a pencil. This is more a visual assurance that we didn’t mess it up so far, everything is still reversable at this point.
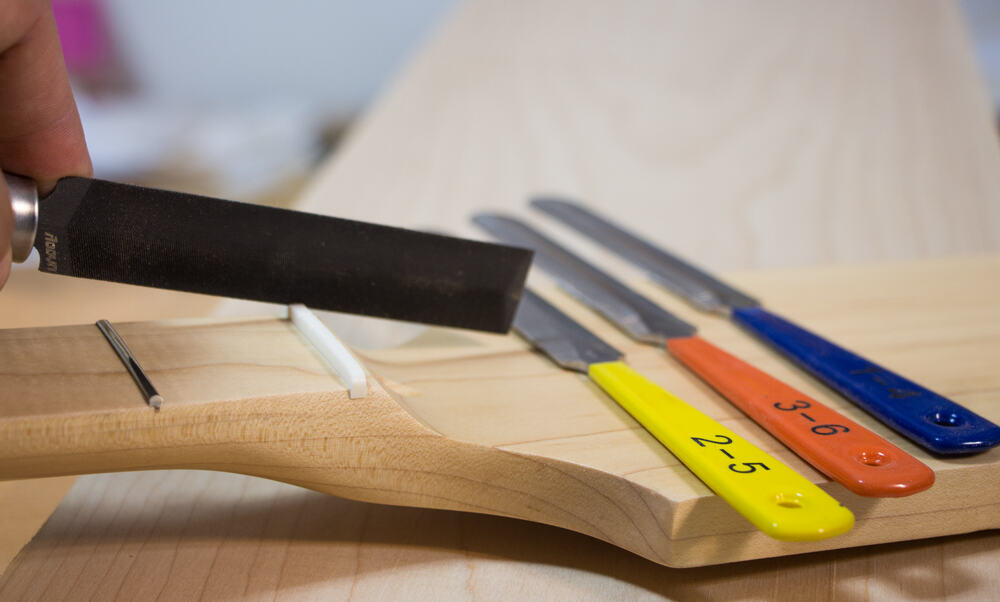
Scribing with a Blade
If it looks good we are on for scribing with the blade. Remember to alight the ruler to the blade marks we made, and not just the pencil. It is important to start with gentle strokes of the blade. The grain will make the blade stray if you use force. We are just trying to mark the position and give the saw an easier path to follow.

Re-scribing with a second blade
To make it even easier for the saw blade, I will repeat the last step with a thicker blade of a box cutter, to slightly deepen and widen the cut. Here again, too much force will make the grain fight against you.Make a few light passes, deepening and widening the slot ever so slightly with each stroke.
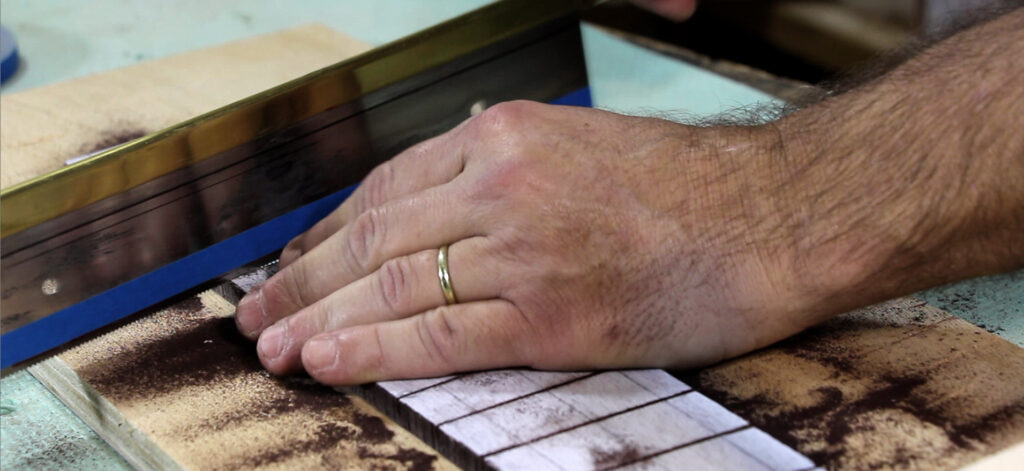
Slotting
We’re in the final stretch, it is time for sawing. Whip out your fret slotting saw and carefully start cutting away. I like to either put a strip of masking tape or draw a line at about 4mm depth as a visual guide while cutting into the fretboard. Some of these saws come with an adjustable depth stop. To avoid slipping out of the slot I guide the front side in with my finger and after I have established some grip into the groove, I start working my way into the back side. I might reverse this, and do the back first, after all we have 25 of these to do.
Do try and stay focused and consistent in your motion this will affect the width of the slots. This will take the same amount of time as straight slotting, but if you are used to working with a jig, this will require a bit attention.
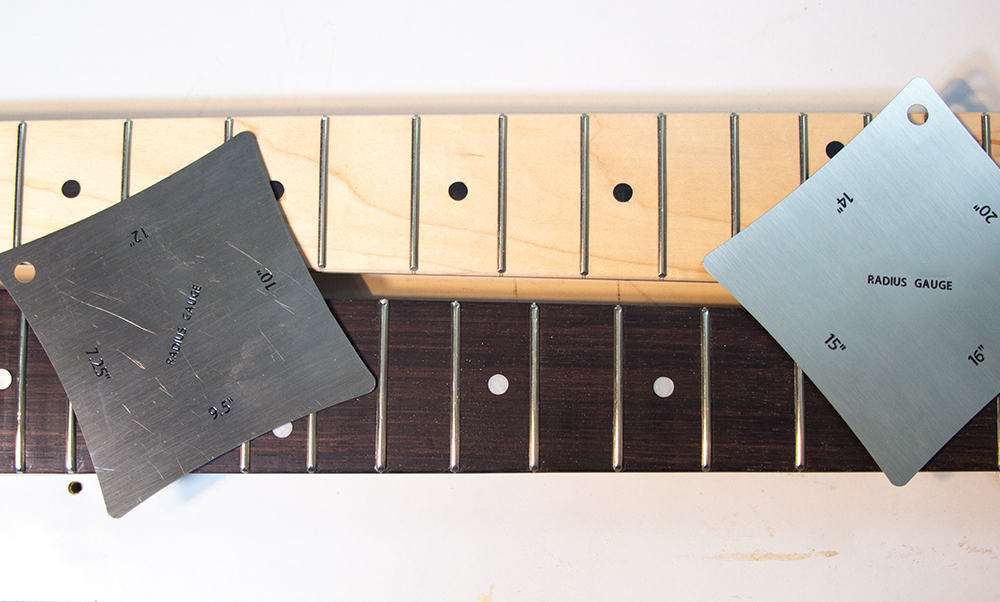
Once done sawing you can give it a good sanding to take the paint off, or just continue with radiusing which will do the job two. Whatever your next stage is in the process, you now have a custom made multi-scaled fingerboard.
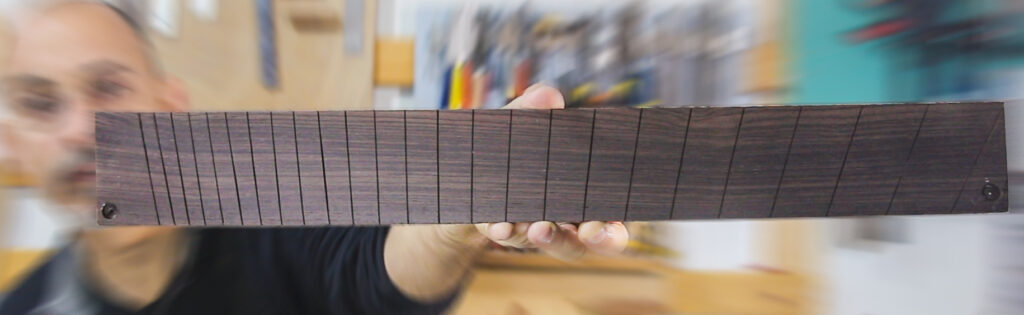
It’s a bit more work than single scaled fretboards but I hope I have made as clear and simple as possible.
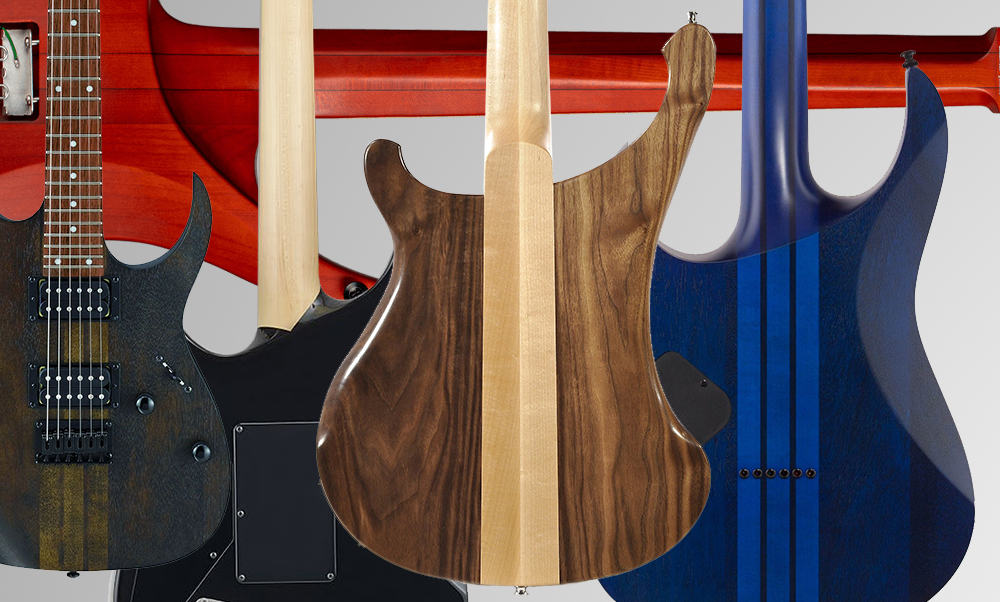
What about a multiscale fretboard for 7 or 8 String Guitars?
A multiscale fretboard is a natural choice for guitars with more than 6 string. Since the 7 and 8th strings are tuned lower than the standart low E, the longer scale length will lend itself to the longer and thicker strings without sacrificing the tention and intonation for the thinner strings as well. In fact, some of the more established manufacturers of 7 or 8 string guitars, such as Ibanez, Schecter, ESP and Strandberg, all have multi-scaled lines added, if not exclusive to these lines of guitars.
How do you Measure and Slot the Fretboard of a7 or 8 String Guitars?
The process would be exactly the same as a 6 string fretboard. The differences would be a wider fretboard, to accommodate those added strings, a flatter radius, and a longer scale length for the lower register. Some of these 8 string guitars will reach a 28” scale length, which literally means you have added two baritone strings to your 6 string guitar.
{{Information |Description=Brian May – koncert w Stodole w Warszawie 30.09.98. Autor pl:Wikipedysta:Kozlorf |Source=Originally from [http://pl.wikipedia.org pl.wikipedia]; description page is/was [http://pl.wikipedia.org/w/index