Other than a few lucky people who consider the act of sanding a sort of Zen meditation, most of us just want to get it done with. Add the fact that your guitar is going to be seen and judged before it is going to be heard, and we need to find the method for sanding in the quickest and most efficient way we can.
What is the best way to sand a guitar?
- Prepare your surface for sanding
- Understand what is the finest grit you can start with
- Move methodically to the finest grit you want to finish with
- Add stains, dyes or color
- Done
You may think this is nothing new, and it would still take forever and be just as frustrating, and that would be partly true, but understanding the method would get you through sanding more efficiently and without wasting time.
What is sanding anyway?
When we sand, we actually remove all the material around our deepest scratches and grooves. The amount and depth of our starting point will depend on whatever form of shaping or smoothing we had before. For example: if we were shaping a neck with a rasp saw, we would have much deeper scratches, than a surface we have planed. This is why your methods and tools for shaping, cutting and preparing the various parts will have a great affect on your sanding, even before you start.
Prepare your guitar (for sanding) like a Pro
Different tools have different uses and although some of them can be more versatile and not all of us have all the options at our disposal. You can cut a straight line with a circular or table saw. But if you don’t have one, or it’s not comfortable for the specific job, you can also use a band saw or even a jigsaw. You know that a band saw, even if straight will not give a clean-cut as a circular blade, and a jigsaw would even be worse, but you accept the fact that you will need further smoothing after the cut. Shaping is the same. When shaping and removing larger amounts of material, using sharp blades such as planes, chisels, and scrapers of sorts will leave you a much easier surface to finish than rasps and files, which may require less skill. A scraper for example can get you to a smoothness level above 100 and sometimes close to 220 grit to get started
Understanding Grits
The basic principle is that the higher the number, the finer the finish. I like to divide them into three groups, the exact division can be debatable:
Up to 100: Shaping and leveling, removing tool marks and deep cuts.
180 – 800: Smoothing and preparation for finishing
1000 and up: Finishing and polishing. These are used between coats and to finalize, bordering on polish.
There are a couple of numbering systems but as long as you stick to one of them or just a certain manufacturer of sand paper. There are also a few types of materials from which they are made, but the principal and grits are the same.
Lets take a close look at those scratches
The lower the grit number, the deeper it goes. Here are a few examples of what sandpaper scratches look like up close: These are magnified images of sanded poplar. The medium-length grain here is the short lighter horizontal lines. I have sanded vertically, against the grain to make it more visible and apparent.
With the 60grit paper, you can hardly make out the direction of the grain, and the scratches are very deep. It looks like a mess. At 80 grit we start to make out the grain from the scratches.
At 100 grit you can start seeing the surface between the scratches and at 240 grit to 600, you can see the scratches slowly disappearing. Only at 1200grit, you can actually see the grain with no visible scratches. This does not mean you need to sand to 1200grit, but we’ll get to that in a bit.
The sanding processes
When we sand, we actually want to get to the bottom of our deepest scratches.
If we have very deep scratches, let’s say equivalent to a rasp saw, a rough file, a dull blade, or even 40grit sanding paper, we need to tackle it with roughness to match. If you jump on it with 400 grit paper, you will exhaust your hands, go through a full stack of sandpaper and maybe burn your sander, and you will literally just scratch the surface. Pun very much intended.
This is about removing as much material and getting to the bottom of those scratches in the quickest way and by making new, shallower scratches and shallower scratches.
Where do we start then?
The key here, is to visually assess the surface and decide what to start with. If we start to low, we are just going to make things worse and take ourselves a step back. Starting too high will not be effective. Do a local test and feel the area, is it smoother than the surrounding area. Now take a close look, you may have smoothed the surface, but left some deeper visible scratches which will require going back to a lower grit. This maybe a local issue or over the whole surface.
After you have found correct starting point and fixed the localized issued. The hardest part is leveling the whole surface to it. Depending on the type of wood and the quality of sandpaper, it’s smooth sailing from here on.
How high can I skip going up the grits?
Our tendency is to want to skip the middle grits and go straight up to our final grit once we start seeing smoothness. Do resist, you will need to sand much longer, go through more sanding paper, and often need to go back to lower grits if you skip too high. The rule of thumb is to jump less than twice your grit, and preferably 150%. LESS IS BETTER So at 80, go to 100 or 120. At 120 go to 220 or no higher than 240 and then skip no further than 400. From 400 you can jump to 600 and you will probably not need 800, as most coats will fill these scratches. The good news here is that you will end up spending much less time sanding per grit.
The 80 grit paper will relatively easily remove the 60 grit scratches but will leave you with 80 grit scratches. A 120 grit paper will remove those much better than a 400, but again will leave the 120 grit scratches. Follow this principle and you will get to the 400 grit faster and with more ease.
Sanding tip: Thoroughly clean all your surfaces when moving up with the grit. Aside from dust particles, you may also have some sandpaper grains from a lower grit. These may scratch your surface if they get in the way of the higher grit.
How do I know when to move up to the next grit?
Other than just looking at the scratches and seeing when the bigger scratches disappear, Your other hand, is also a good indicator. Even if you like using gloves when working, you should always have the non-sanding hand gloveless to feel the surface.
You can also lightly use a pencil to draw lines covering the sanding area. When the lines disappear, you have removed another layer. If you skipped to a grit too high, you may still remove most of the pencil marks, but not the scratches. So be aware, No Cheating!
How high do we want to go?
The final smoothness of your guitar and surface will not be determined solely on the final grit you use, but also by the finish. Somewhere around the 400-600 grit, the surface is smooth to the point where the grain plays just an important part to the overall smoothness and the effect it will have on the finish as the sanding itself. At these grits you will proceed according to the type of finish you want to apply.
Is it possible to sand ‘too much’?
In a sense, yes. A surface which has been smoothed to a mirror smoothness, lets say you gradually went up to 1500, will surly look great, but may be problematic for a few reasons. It will be less absorbent, harder to adhere to and if it has open grain, that was not solved either.
Too smooth for stain
There is a known issue with stain becoming darker at the open grain side of the wood, the reason for that is that there is more stain or oil being absorbed there. In much the same way, any wood surface which has been thoroughly sanded will slowly become less absorbent and will therefore not be as receptive to stains and dyes. Of course, this will also depend on the type of wood and the type of dye or stain you are using. 400 grit is a good medium to start experimenting around. It will usually be smooth enough to look good and start layering finishes, and rough enough to let stains, dyes, and oils penetrate. For deeper, darker colors, you may want to try going to 320 or maybe 240 grits. On the other hand, more penetrating dyes may give good results at 600 grits as well.
Too smooth to stick
Finishes and glues need a certain amount of roughness in order to cling to a surface. This is why materials such as plastic, glass, and most metals will require some type of primer before you lay any type of finish on them. Sanding your guitar too smooth can have that effect too. Ultimately the smoothness of the finish will determine the final look and feel of the surface, so this will not serve us anyway. Here too, a 400-600 grit is usually a good area to start experimenting with for most finishes.
Smoothing the grain
Wood is a wonderful material, but we need to remember that it is natural and will not behave like engineered materials. No matter how much we sand it, it is still a porous surface and, depending on the type of wood, will have grain. Now, there is nothing wrong with showing grain, and often we will actually want a finish that will highlight it, but strictly speaking about smoothness, it may present some challenges.
Raising Grain
You will often find that after applying the first coat of finish, your 400 grit sanded surface has become somewhat fuzzy. This will be even more evident if you were using a water-based finish. This is just the grain reacting to moisture and raising, and can easily be sanded before the following coat. This can be avoided to great extent, before the first coat, by lightly going over the surface with a wet cloth. You don’t want to soak it, just get it a little moist to bring out the color of the wood. This should dry in a few minutes and then you can sand the fuzz. Repeat this if you feel necessary.
Dealing with open grain
When dealing with porous open grain woods and smooth finishes, sanding will not be enough. In the guitar world these will typically be Mahogany, Ash and Rosewood. Since the grain pores are an inherent part of the wood, you cannot sand them, there are always more of them underneath. The only way to get the surface smooth then, is to fill it

Grain Filler
The best way to fill grain is with a designated product called, that’s right, Grain Filler. Grain fillers come at various viscosities but are usually as thick or thicker than paint, although there are liquid varieties. They can be and often are tinted and will be applied and then when dry sanded completely off. Well, not exactly completely off, they will remain in the pores of the grain. Aside from filing them, they will accentuate the grain by darkening and giving more contrast or tinting it. Because they are not meant to affect any parts other than the grain, and they are thoroughly sanded off, the grain filler can be applied after lower grits like 240, and further sanding can be done afterward. Sanding it off with 240 paper will also make the removal faster and easier.
This is the ideal method. Other, less effective, methods of grain filling involve layering finishes, and yes, more sanding. Depending on the type of finish you are going for you will need to apply multiple layers.
Filling Grain with an Oil Finish
Oil finish penetrates the wood and grain, and with enough layers, will eventually fill the pores. To improve the filling effect, you can apply the first layer using very high grit paper (or sanding sponge) to create small sanded particles which will mix with the oil, penetrate the grain and dry with the oil. Do make sure to remove excess oil of this layer. Subsequent layers will seal it.
Filling with other finishes.
Whether using clear coats or flat colors, enough layers of material with final, or between layers- sanding, will eventually fill the grain but will be very wasteful in both the amount of paint used and sanded down and the amount of work needed to apply it. Here too, to speed up the process, you can apply a slightly diluted layer of the first coat, using a high grit (1500 grit or so), paper, or sponge. This will create fine dust which will mix with the lacquer polyurethane or even nitro finish. Probably not a good option with flat color.
Using Sealer for grain filling
Sealer can also help with filling grain as it has more solids than the average clear coat and can easily be built up. It also has the added advantage of being easy to sand. This is not the intended use of a sealer, but can be used, and will probably do a better job than the above alternatives.
What about power tools for sanding?
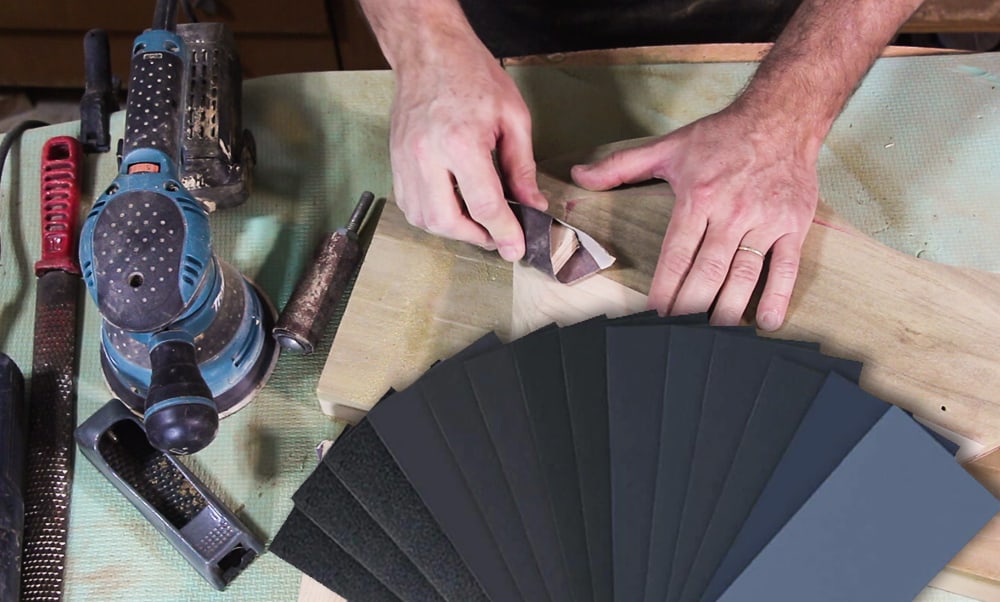
Power tools are a great option for cutting down on sanding time, with a few things to keep in mind. The ideal tool is probably the random orbital sander as it is gentle enough, some also have speed control, and the randomness will avoid leaving marks from the rotation. The smaller the better in my opinion, as they are more comfortable working with one hand.
Belt sanders are pretty much a NO, No. They are usually much too fast and will leave marks and gashes. You can use them for things like shaping the armrest contour, but even then, I will prefer the alternatives
Hand sanding is still a valid method for sanding and will always be a large part of the process for both finer work, localized work and areas where only a hand can reach. Working methodically through the grits will eliminate the need to use much force, and will hopefully make the process easier as well.
Conclusion
Once you have finished shaping your instrument, getting the smooth finish you want will be the result of thorough preparation as well as using the correct sandpaper and method of progression. Further coating and polishing may be applied and may also require fine sanding with much higher grits. This will be more specific to each type of finish and method of polishing.

