
Whether you are building a guitar or playing one, at some point you are going to have to work your truss rod. A great guitar with a truss rod that not installed or set up properly is not going to give the plying experience it can and should. Many people are weary of touching the truss rod in fear of throwing the guitar off.
Truss rod adjustment is really not that scary or dangerous to your guitar if you understand how it works and how to be careful with it. In this article I will try to answer all the questions you may have concerning truss rods. I will also cover the principles of both truss rod installation and adjustment
What do truss rods do?
Any metal stringed guitar will have to deal with strong tension which may over time pull the neck up to create what is called an up-bow. The first function of the truss rod than, is to counter the neck’s tendency to bend forward. The construction of most modern truss rods also has the added benefit of enabling the adjustment of the neck angle or the neck relief.
More details on exactly how to do it later.
Do all guitars have truss rods?
The general answer would be, yes, pretty much any electric guitar or acoustic guitar that carries metal strings should have a truss rod. Classic and Spanish guitars are probably the only guitars that do not have truss rods as they have nylon strings which produce much less tension. When metal strings starting being more popular Gibson were the first ones, back in 1921, to develop and patent an adjustable truss rod. In fact, Leo Fender who was trying to create a very economically efficient guitar in the late 50’s started manufacturing the guitar, that later became the Telecaster, without a truss rod. Fender soon realized that an electric guitar without a truss rod would be very problematic and all Fender guitars were equipped with a truss rod since.
Do classical guitars have truss rods?
As mentioned above classic guitars do not generally need a truss rod and in most cases a properly built guitar with nylon strings should be able to withstand the tension and maintain the integrity of the neck.
How does a truss rod work?
The basic principle of the truss rod is very simple and is applied in a slightly different way in the two types of truss rods.
Traditional ‘One Way’ or ‘Single Action’ Truss Rod. This is the simplest type of truss rod which has been in use in most Fender and Gibson guitars since the 60’s. Since the strings will only ever pull the neck and never push, countering that action is really what you need to adjust the neck. The ‘one way’ truss rod consists of a threaded rod which has a stationary nut at one end of the neck and an adjustable nut at the other. Tightening the adjustment nut will correct an ‘up bow’ in the neck. Loosening it will not affect the neck, unless it was too tight, in which case it will just bring it to whatever state it was at. There is now real way to adjust a ‘back-bow’, which is not as common, hence the name: ‘one way’.
The ‘Two Way’ or ‘Double action’ Truss Rod. These have the benefit of being able to adjust an Up-Bow when tightening and a ’Back Bow’ when rotating the other way. The ‘two way’ truss rods are built in a way that they deform independently of the neck and do not actually latch to the neck on one end. Instead there either round spoke or a flat rod which is welded to the threaded rod on one side and welded to a metal sleeve on the other.
The threaded rod runs through that sleeve to an adjustment nut sitting behind the sleeve. Both the spoked version and the flat one performs the exact same way and are usually adjusted at the headstock side of the neck. The bulkier spoked version is designed for ‘stubborn necks’ and is probably a bit of an overkill for the average neck. The flat ones are probably the most popular amongst today’s custom guitar makers. The flat one has the added benefit of having a lower profile and require less routing leaving more neck material and not requiring any additional stripes or concave installation. More on that when we talk about installation below.
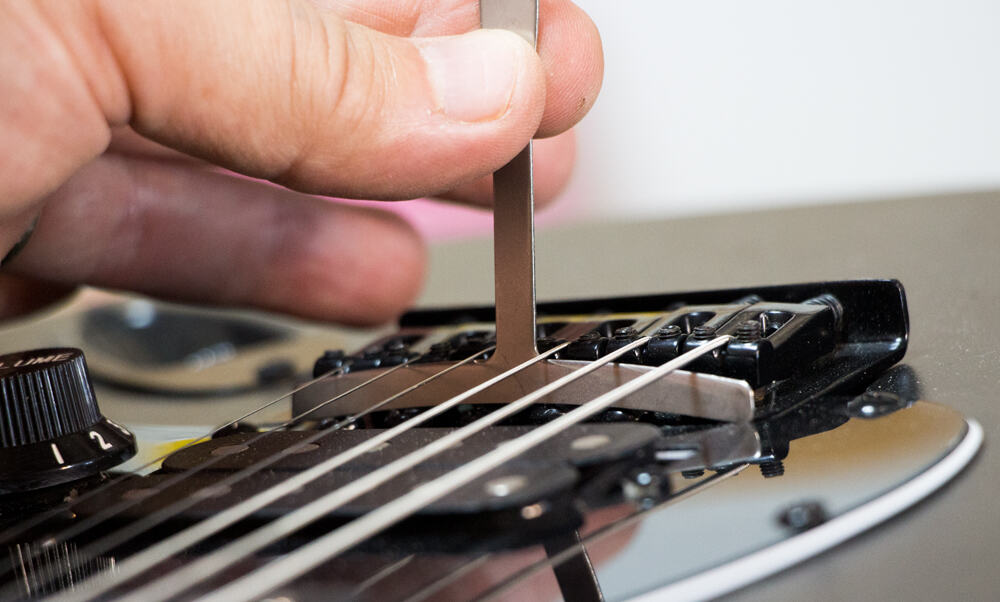
There are many types of interfaces for the adjustment nut but all serve the same purpose, rotating. Most truss rods will come with the appropriate tool for adjustment although they usually require tools you should already have in your shop, either a screw driver, a Hex key or an Allen key.
There are also two-way truss rods built from a single rod that do act like Two-way truss rods but they will have anchors on both sides of the rod and will counter their pressure against the wood in both directions.

Which way should I turn the truss rod?
The good old “Righty tighty, Lefty loosy” is how I remember, so feel free to use it (no need to say it out loud every time). Now all you need to remember is that when you have an up bow and you want to flatten it you will need to tighten your adjustment nut, hence turn right – clockwise. If a back bowing is the issue, or when the neck is totally flat and you are trying to give it a slight relief, you would want to loosen the nut, turning it left -counter clockwise.
How much should I turn the nut?
Less is better. Very small increments are needed when adjusting a truss rod and you do not want to overshoot and come back. Starting with a 1/8th of a turn to then desired direction would be a good start. For older guitars and if you think you need a serious adjustment it is advisable to first loosen an 1/8 of a turn to make sure the nut is not stuck. After the first little increment, check to see the difference.
Should the neck be perfectly straight after adjustment?
The general answer would be no. Although some guitar players claim they like low action and therefore want to keep the neck perfectly straight, it makes no sense to the way the guitar and strings work. The strings vibrate when playing, without it there will be no sound, acoustic or electric. The amount of vibration will depend on the strings’ tension and thickness as well as the playing style. In any case the largest vibration and motion of the string will be at the in the middle of the string, at the 12th fret. If the distance from the string to the 12th fret is the same as the distance from the 1st fret, you will either have very high action on your 1st fret or have buzzing all over you r fretboard. The neck relief, or the slight bend to the neck is meant to accommodate the amplitude of the string vibration without compromising the action.
How do I know if I have gone far enough or too much?
A straight edge or even a notched straight edge is the preferred tool for the task, but putting a capo on the first fret and pressing the 6th string at the last fret will also give you a good indication of how high the relief is. Look around the 8th fret and see what the distance is between the fret and the string. If it’s touching than your neck is either straight or in a back bow. If you can fit a business card there, you are just about right. Fender define it as 0.25mm or 0.1”. There are different personal preferences to the desired relief and action, but this is an excellent point of reference to start tweaking. And if there is a much larger gap, you probably need to tighten the truss rod
Which way to turn truss rod to stop buzzing?
If your guitar has fairly low action and your frets are level but still get some buzzing, the rule of thumb is that a bit more relief should solve it. In this case a slight loosening- anticlockwise turn should fix it. Remember that neck relief is not the only possible reason for buzzing and a total tune-up will always include checking the bridge action, nut and possibly the frets. If you continue to create larger and larger relief to the point where the action becomes too high and the buzzing persists, you should probably do a more thorough check to see where the problem is.
Can you adjust the truss rod with strings on?
Here too there are different opinions. Since many experienced Luthiers use either method, I conclude that although there is sense behind both, neither is critical enough to be a ‘deal breaker’. I will bring both with their rational and you can make up your own mind.
Method # 1: Always loosen or remove the strings when adjusting the truss rod.
When adjusting the truss rod, you may be pulling the strings, which may break and introducing unnecessary pressure on the neck, headstock and tuners. This may also skew the result until you retune the guitar.
Method # 2: No need to remove the strings for truss rod adjustment.
The extra pressure put on the strings IF they are getting pulled by the adjustment is no greater than aggressive tremolo action. Adjustment without strings will not give accurate results because you need to take into account the string tension for tuning the relief and action.
Are truss rods with adjustment at the headstock side better than the ones adjusted at the neck base side?
There is no real difference function wise between truss rods adjusted at different ends of the neck. However, there can be a substantial difference at the ease and comfort when adjusting the truss rod. Most guitars have the adjustment element at the headstock side and will require no extra work other than removing the truss rod cover if there is one, and turning it with the appropriate tool for the particular one. However older Fenders for example have the adjustment screw in the middle of the neck profile and will require either the removal of the pick-guard, the loosening the whole neck or total removal of the neck. Doing this will not enable checking the required relief before reassembling the neck and may sometimes require repeated assembling and disassembling of the neck before you get it right, which can be annoying at best. Other truss rods adjusted at the neck side use the wheel version (like most Music Man Majesty guitars) do not require any disassembling and can be adjusted just as quick as any headstock mounted ones. The do push the neck pickup a bit more towards the bridge but that is part of the design. Personally, I can’t see a reason for choosing a truss rod which is hard to adjust but the decision can come down to personal aesthetic preference (some people hate the way the headstock looks with a truss rod tip or the cover) or the preferable construction method.
How long does truss rod adjustment take?
If the only issue to fix is the truss rod, it can literally take a few minutes. Slight adjustment to git rid of overall buzzing, for example, may require an 1/8 to a ¼ of a turn so after checking the original relief and making the actual adjustment all you need to do is retune the strings and you are done. Now if your truss rod is adjusted on the neck heel side, you may need to disassemble the neck, make the adjustment, reassemble, tune it and check if it was enough. You may need to repeat this process more than once until you get it just right and that may take much longer than a few minutes.
How long does it take for the truss rod to settle?
Any truss rod adjustment changes the dynamic tension between the metal rod itself and the wood of the neck. Whenever a change is made the wood which is organic and softer than the metal, will react instantly but will take a while to fully absorb and settle into its new angle. There are various opinions as to exactly how long you ‘need’ to wait before the neck has settled. There are experienced people who say there is no need to wait and that the adjustment is settled within minutes. The general sentiment is that a slight adjustment will probably be stable after a few hours. If there was a major adjustment after something like a re-fret, it may take up to a couple of days. Of course, this will depend on the type of wood, the strings and many other variables. This is why it is always advisable to not overshoot with the adjustment and only push it 80-90% and wait for it to settle. Extremists will even refrain from playing the guitar for up to 48 hours after any adjustment, but that that does seem excessive. The guitar will be totally playable in the ‘waiting’ period but you just need to take into account that you still need to check it again even if it’s only to verify you hit the spot.

How do you deal with changes in temperature and humidity?
There is no magic trick to compensate for changes in temperature or humidity. Whether you are traveling to another climate or just with the change of seasons, the wood may react by contracting, expanding or twisting. The type and quality of the wood will be the be the most critical factors in determining how much your neck will be affected. Sadly, we have no control over any of these and the only thing we can do is adjust the truss rod. It is also the exact thing to do to fix it.
Truss rod installation
The common thread between all types of truss rods is the routing of a channel along the neck to house the rod. This channel will be 6mm or ¼’ wide to fit the vast majority of truss rods. If the channel is routed from the back of the neck it will be covered in what looks like the ‘skunk stripe’, common in many Fenders. Many other manufacturers rout the neck from the top side and cover it with fingerboard so the only hint to the rod’s existence is the adjustment screw. Aside from the side and type of the adjustment screw the other major difference in installation is between is the need to install the rod in a bent position.
Does it need to be bent during installation?
One-way will not work properly, unless they are installed in a concave shape. Because all they really do is try to pull the neck back from an ‘Up bow’ to straight, they need to bent to begin with. You can’t straighten something that is already straight. These will have an anchor on one side and the rod will be tightened at the other end. That action will straighten the rod while bending the neck with it at the process.
Two-way rods bend independently of the neck so aside from the tight fit they need in order to not rotate inside the neck, they just need to sit snugly in their channel. Once tightened or loosened they will apply pressure on the neck itself and it will be forced to adjust.
How deep should the channel be routed?
There is no one size fits all when it comes to the depth. Although the thickness is almost similar with most types of truss rods and really depends on the specific one you have.
The one-way truss rods are only as thin as the rod itself. They do however need to be installed in a bent position, so the actual routed channel will have to much deeper. The depth will not really hurt the strength of the neck because most of the space will be filled later with a wooden strip which will be glued to hold the rod in place.
The two-way rods don’t require to be installed in a bent position so the routing needs to only be deep enough to fit them. Depending on the model the two-way truss rods will usually be routed from the top part of the neck and installed to be flush with it. The fingerboard will be glued to cover it.

Conclusion, or Which truss rod is right for me?
When you design and build your own guitar, you can choose the type of truss rod you want. There is no big difference as functionality and practically all truss rods, properly installed, will enable adjustment of the neck. The type and quality of the tools you have may also be a consideration for installation. Here are a few considerations to take into account when picking a truss rod:
One-way rods look simple, but are required to be installed bent.
The two-way rod with the flat bar will require the shallowest straight channel and are probably the easiest truss rods to install.
Most rods with adjustments at the neck heel side, will require more work to adjust. The exception to the rule are the wheel type nuts (Music Man style) but they will need space and access between the neck and the neck pickup.
For stiffer woods you may want to consider the two-way double rod ones. They require flat deep channels but will provide more strength to the adjustment.
The tougher Rods may also be your choice if you are using very thick strings and find yourself needing frequent adjustments.