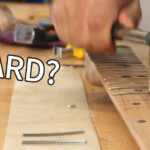


Until Leo Fender came up with the flat headstock, pretty much all the guitars (and most other stringed instruments) had an angled neck. The strings need to have a break angle at the nut and it makes total sense to tilt the headstock backwards. The one major downside of a tilted headstock is its vulnerability to breakage and many Luthiers would agree that the best method to remedy that is the Scarf Joint.
Why use a scarf joint on a Guitar?
The scarf joint is a method of connecting a separate piece to create the tilted headstock in a way that eliminates the point of weakness that is created when building it from a single piece of lumber. There are two common methods to achieve this and they involve cutting the headstock part at the desired angle, flipping it, and re-gluing in an angle. More on how to do it in a bit.
Why are one-piece tilted headstocks weaker?
The strength of wood comes from its grain and the grain direction. Any piece of wood will be significantly stronger and flexible along the grain, whereas across the grain will be weaker and brittle.

When using a single peace of wood and simply carving out the desired shape, the grain will run along the grain for the majority of the neck and will indeed be very strong.

When sloping down the headstock though, there is a part where the grain (still in the same direction) is cut off at both ends and in fact, becomes very short. Due to the constant force of the pulling strings, this area will always be under stress and can relatively easily be broken. Sadly, the common occurrence of broken Gibson headstocks is a testament to that.
Why are guitar headstocks angled?
As far as the Lute (The modern guitars’ ancestor) headstocks were angled. Till this day many electric guitars, and most notably Gibsons, have an angle, in some models up to 17 degrees. Even so-called flat-headed headstocks have a break angle to the strings themselves. A minimal angle is necessary for the strings to properly intonate. If there is not enough pressure on the nut (or fret for that matter) the sound will either be faint or buzzing. The angle creates a downward force, hence the pressure. More on the difference and the pros and cons of angled headstocks in Angled Vs. Flat Headstock, Which to Build?
Is there a minimal angle for a headstock?
As apparent by Fender style, flat headstock, that would be a ‘no’. There is, however, a minimal angle for the string itself, and it is not actually determined by the intonation but by the practicality of the string popping out of place. If you try and figure out the minimal angle necessary, just look at a typical Fender headstock. The use of string trees shows that the first to fourth strings (or just third in some cases) needed that little pull down to achieve an angle just sharp enough to keep them in place.


What angle is a scarf joint?
There is no set angle for a scarf joint. It’s a jointing method. Most guitars who use a scarf joint will use between 8-15 degrees and the reasoning for that is partly traditional . On the practical side, the shallower the angle, the more gluing surface and therefore a stronger joint.
Is a scarf joint strong?
When most headstocks break, usually due to a fall, you can clearly see the grain lines where the most vulnerable are was. A properly glued scarf joint will make the headstock much stronger and if it does break, it will not be the joint that fails.
How do you cut a scarf joint on a guitar?
The idea behind the scarf joint is to avoid having short parallel grain running across the headstock and instead cut and paste the long grain in an angle. There are two variations to this joint, each one with its pros and cons. Before we start cutting, we need to decide on the variation we desire, as the cut may be in a very different place.
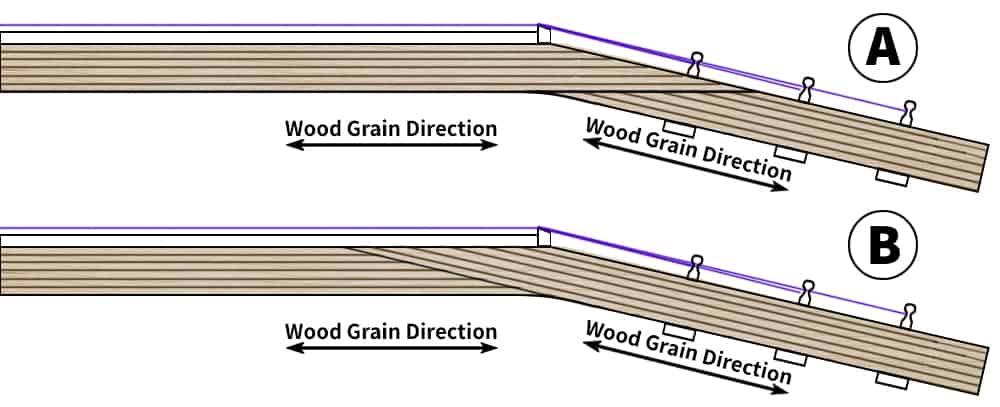
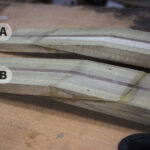
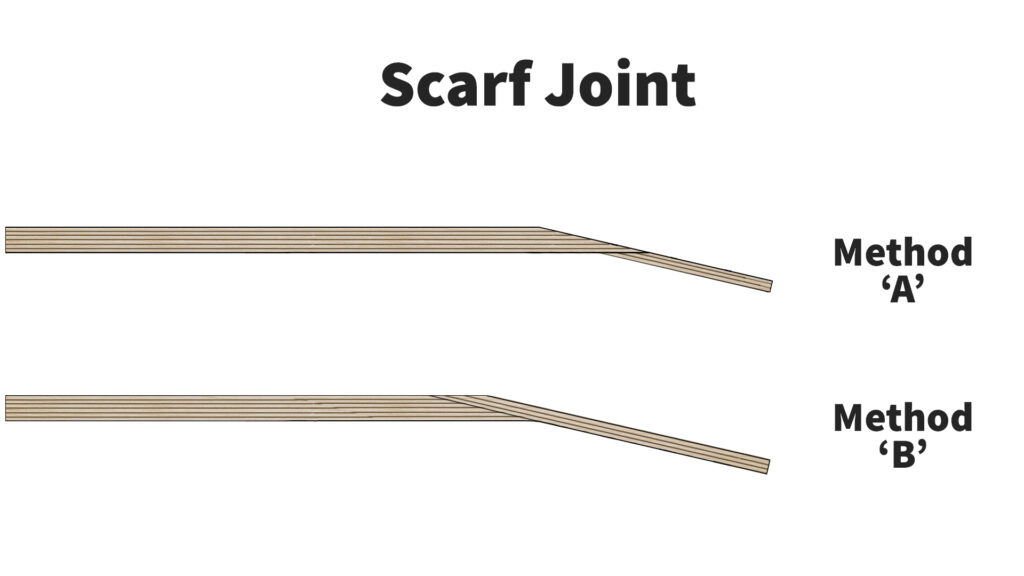
So, the first method, Let’s call it ‘A’, cuts the headstock part at an angle, then flips it and glues it underneath the neck, to continue the angle. The second method, cuts a significantly longer piece for the headstock, again flips it, but glues it in front, as an extension of the neck. So on the practical side of things, the cut piece or the position of the cut needs to be very different. Before we do some simple math let’s talk about the differences.
Which Scarf Joint method is Stronger?
First , is strength, that’s why we are doing this in the first place. Properly done, both methods should be fine and be stronger than without it. As far as gluing face, odds favor method ‘A’. If we correct the thickness of the headstock
we see that we actually loose a bit of gluing surface compared to Method ‘B’.
One could argue that in method ‘B’ there is some more leverage against the joint, by the strings, as the joint is farther from the tuners. To counter that, you could say that method ’B’ has an advantage in that the headstock piece is sandwiched between the neck and the fretboard, and that provides extra strength.
Which Scarf Joint method looks better?
As far as looks, it’s quite simple. How visible the joint is going to be depends on the type of wood and the quality of the joint, but mostly on whether you are going to cover it. If you are going with flat color, it makes no difference. Type A joint will have a visible line running across around the middle of the headstock, so if you are painting or putting a veneer on the headstock face you may only see it on the sides and at the end of the neck, right behind the nut. Type B will work better with a ‘naked’ headstock and will only have a visible seam behind the nut and diagonally on the sides of the neck.
Steps to Cutting and Gluing a Scarf Joint
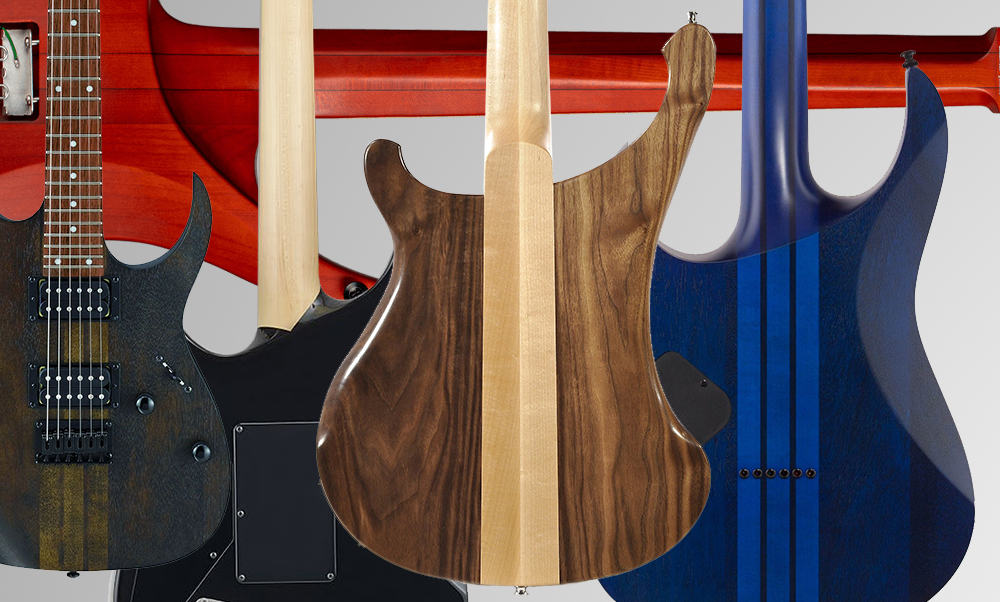
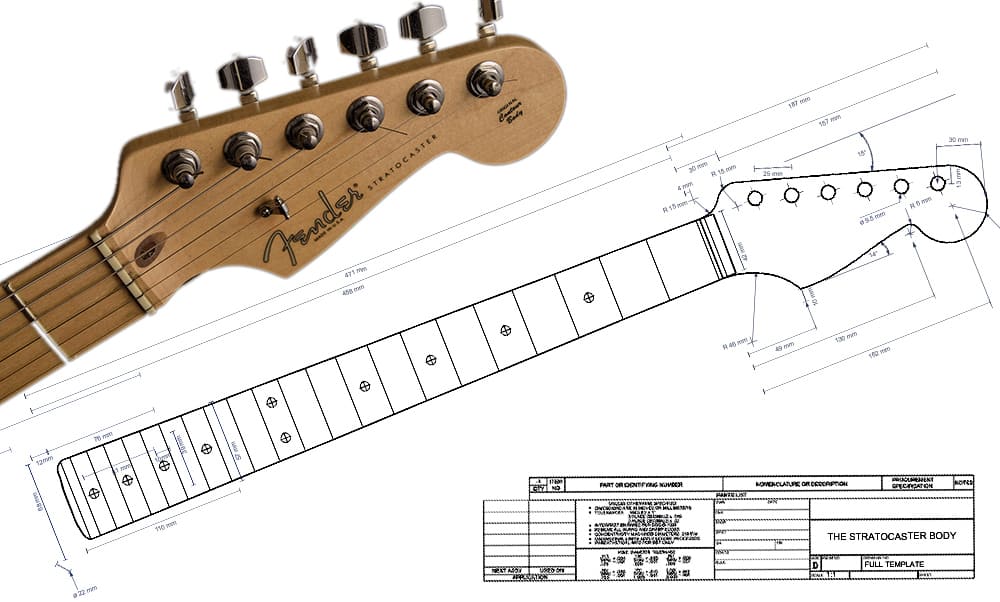
We start with a neck blank. This can be a laminated neck or a single piece. You want it to be as least as wide as your heel, but if you want to save the trouble of gluing ‘wings’ for a wider headstock later, have it wider. A Vintage Gibson headstock is 3” which are 78mm and it’s one of the widest if not the widest. . As far as thickness, if I’m Ignoring the heel, it can be as thin as 20mm or just under an Inch. If you are building a Gibson style set neck, your heel will determine the thickness. Another consideration for thickness is if you are planning on a chunky volute. You should have enough ‘meat’ left even with a 1” blank, but if you want more, just take it into account.
Where it may supposedly, gets a little tricky is the length. So, lets break it down. In the ‘A’ method your neck is going to be longer, but the headstock piece is shorter. In method ‘B; the neck only reaches to the nut but the headstock piece will be longer and extend to the neck. Let’s Put some numbers on that to get a better sense of the size. I’ll use a Vintage Les Paul as an example, because A, they are fairly consistent with most Gibsons and B. I assume if you’re tilting the headstock, it’s not going to be a Fender. PRS builders, take into account a slightly longer fretboard. At This point you should have a few inches to spare regardless of the style of guitar. And I will round up the measurements as well.
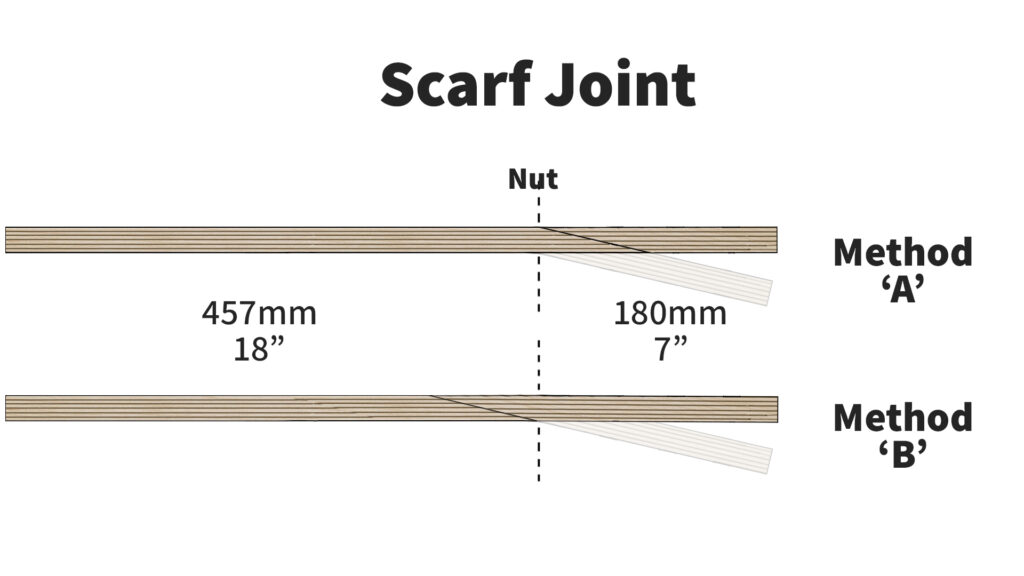
So if our fretboard is 457mm or 18” and our headstock is 180mm or 7 “ we can add a couple of inches for the cut itself and some sanding and we get about 640mm or 25”. I did not take into account the actual angle you are using but in fact it makes little difference to the size. You are however going to have a longer cut with much more gluing surface, with shallower angles. In Fact, the difference is where you position the cut on the same neck blank.
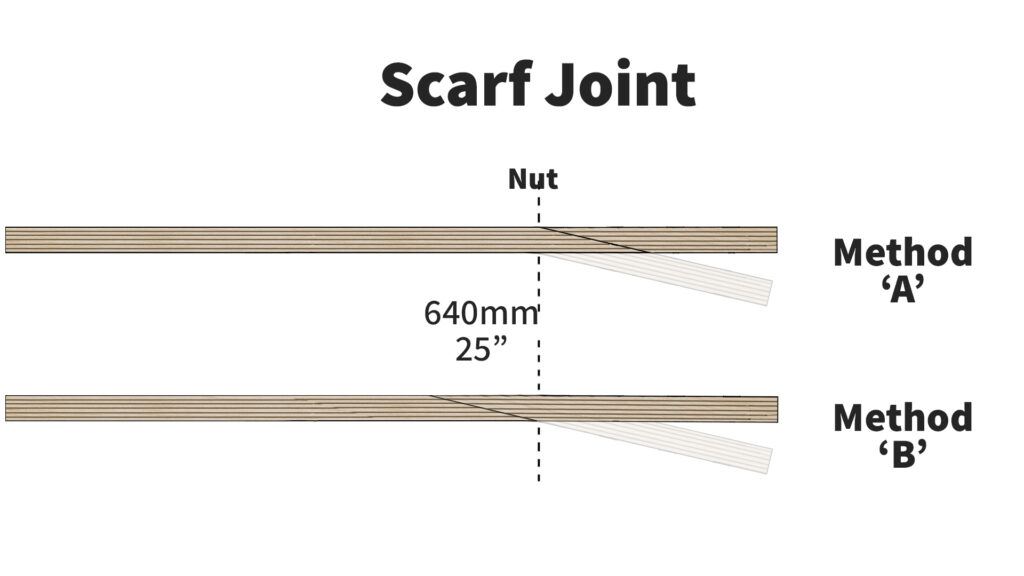
Regardless of the chosen method a good point to start from is the nut. Method ‘A’ will have the cut starts at the nut, in the front of the neck and cut diagonally towards the back of the headstock, whereas method ‘B’ will start at the back of the nut and work diagonally towards the front of the neck.
Cutting the Scarf Joint
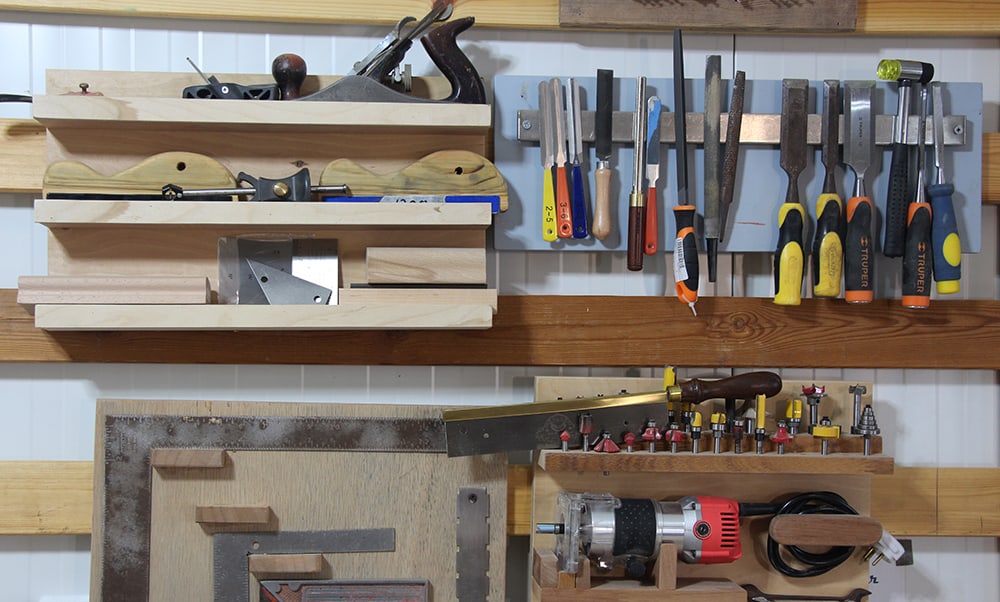
When it comes to cutting the most commonly tool used is a band saw. For that you have to make sure you have perfect 90-degree angles on your blank. A thicker blank will also give better stability, standing on its side, and comfort.
Many Luthiers have a jig which can be as simple as a piece of wood which already has the desired angle, and to which you will attach the neck blank, with either clamps (depending how the jig is built) or double sided tape. Then, using the band saw’s parallel guide, you just slide the neck blank to cut it.

Alternatives to a Band Saw
Sadly, not everyone has a band saw and other alternatives are available.
Cutting manually and achieving a straight cut at a sharp angle is not easy if you are not experienced and have a good sharp saw. As with other methods, a simple jig, which I would make from plywood or MDF, can be a life saver. Little angular parts can be easier to cut and assemble. You would want some kind of guide or support for the blade.
A large enough table saw can also do the trick. Here too a simple jig would help, just to stabilize and give the right angle. This would be carried out in much the same way as a band saw and in fact may yield a much cleaner cut.
Another option is a miter saw, which I will assume more people have than a band saw. It does need to have a blade with a large enough diameter to cut the full width of the neck, and it needs to be at 90 from its table, vertically that is. Most miter saws can’t really cut an angle below 30 degrees. Here too you will need, a jig. This can either be a jig with the desired angle, or simply at 90 degrees and give the angle with the miter saw, after all that’s one of it’s main features. All this jig needs to do is hold the neck or headstock piece and be long enough to leave enough room for the clamp.
Cutting ‘Outside the box’
The problem with this cutting method, is that you can’t really cut in the middle of the neck blank, like everyone I have ever seen do it. But let’s take a step back and think, Do you really need to? All you need here are two pieces that match in angle. Eventually they are not going to be the same thickness because the headstock is thinner than the neck itself, And, they don’t need to have the same width cause the headstock is always wider. Come to think of it, you can use a shorter and skinnier piece for the neck, and match it with thinner and wider piece of headstock. You don’t have to, but this may open a whole lot of new options. For example. I’ve experimented with a few, less then ideal lumber with necks I laminated a few months ago. They are a combination of poplar an Ipea, which rock hard. One of them settled into a slight warp, nothing extreme, but enough to not want to make a neck out of it. I could however make it into a nice matching headstock for the other blanks. I need to remove material and sand it into a headstock thickness anyway..
Cutting tip
Whichever tools or method you are using, it will not be the most trivial of cuts. Take a piece (or a few) of scrap wood of roughly the same type and dimensions, and do a couple of tests before using the actual neck blank, just to get your technique in tune.
Preparing the gluing surfaces
There are two more things we need to do and the order of the operations can be different depending on your method and preference. The thickness of the two headstock pieces needs to be reduced and the surfaces need to be smooth, square and level.
Smoothing the surfaces
Regardless of the saw you are using, what we are looking for is straight and perfectly square cut, which is what we need for proper gluing. So, all gluing surfaces need to planed, scraped and/or sanded to reach that state before attaching them. A belt sander would be preferable here or if you are sanding manually, use a large block or sanding beam. Another option is attaching a sheet or stripe of sandpaper to a flat surface and running the piece on top of it. For gluing purposes, you don’t need high grit paper, in fact, too smooth a surface will not adhere as well.
Adjusting the headstock thickness
The headstock piece which was cut from the neck blank needs to be much thinner. Headstocks are typically about 15mm or 5/8”. This means that they will require significant planing and thickening. Sanding alone will not be efficient for the amount of material that needs to be removed.
A planer you can run it through would be ideal, and you can also hand plane it, or cut it with a band saw. You can even use a router with a sled of sort and shave of the extra material. This part can be done before or after the gluing itself. If you are hand planing, it may actually more comfortable and beneficial to do it after.
Clamping the Scarf Joint
Once both pieces are ready, it’s time for dry clamping. The biggest issue here will be to prevent slipping and moving when pressing with glue. Slippage is bad enough with flat surfaces, and this angled joint can be a nightmare to keep in place There are two ways to avoid this and dry clamping (without glue) will help with both.
The first is by putting ‘stoppers’ to the two parts so they can’t move. Since the pressure and the diagonal cut will make the two parts want to slip away from each other you will want to position blocks on both ends, or even clamp the pieces to a larger surface.
A second way to ensure the parts don’t slip in the actual gluing, is to simply put a couple (or more) screws. I find this un-elegant method most effective and easy to implement.
For method B:
Put the headstock piece on top of the neck part (1) align the two to be level from the top and centered. Dry clamp the two pieces (2)with a few spring clamps (or any other way which will leave enough surface uncovered

Measure, check with the template and mark (3) areas which will later be carved out. Drill two holes (4). Screw two screws (5) and check that the alignment is ok. Unscrew and remove the top, headstock piece. Spread glue generously (6) on both parts. Attach the two parts with the screws and add a clamp on a scrap piece wider than the neck, (7) to better spread the pressure. One by one unscrew and screw the two screws again to ensure no gaps are left, and add a second clamp (8) with another piece of wood for even pressure on the other side. More clamps are optional.
My main concern when clamping this joint is not the amount of force, but how even it is spread. That is why I am putting only two clamps, but putting much wider pieces under them to spread the pressure.
I put some parchment, or baking sheets to avoid sticking of things that shouldn’t. and I do a rough cleanup of the initial squeeze out.
For the ‘A’ method, it’s all the same with the headstock piece glued Under the neck. In this case you also need to work out where to put the screws so they are outside the shape of your headstock. If you really trust yourself and like living on the edge, you can put one of the screws where one of the peg-holes will later be drilled.
If you are eager to continue working on the neck 3 hours or so should be plenty, but I would give it overnight to fully cure before applying any pressure on the joint.