As a hobbyist guitar builder, just like a professional, there is an almost endless list of tools you may want to have, use or just try with every project you take on. There is also a lot of trial and error and finding the right combination of tools and techniques that works best for you in particular and as always you probably also have budget concerns.
These are the tools you really need to have to cover all aspects of building an electric guitar from scratch. Some are manual, and some electric but there will not be a single task during the guitar build I will leave ‘untooled’. We will need tools for cutting, drilling, routing, measuring, shaping, sanding, fretting, soldering, painting and finishing. Naturally many of the tools are the sort any carpenter will have, but some are very guitar specific and you will not find them at the average carpentry hobbyist’s basement or your local hardware store.
How do you choose?
The general guideline in choosing is a combination of ease of use, practicality of getting the job done and price. (A CNC machine is not in this list…) Personal preference will be noted, but will not always be the deciding factor. I will also try and give reasonable alternatives and upgrades to some of the tools. To make sense of it all the tools will be listed according to the different parts and progression of the guitar building process. I will also try and address guitar specific parts of all guitar styles.
Manual or electric?
Lutherie predates electricity and there are wonderful manual tools of amazing quality. The really good ones are not cheap. If you do choose to go the old school ‘all manual’ route, all the power to you, but for many tasks I find electric tools much more efficient, accurate and time saving. Considering the reasonable price of some basic tools, using manual tools instead for any reason other than principle is just silly. Getting skilled with a good set of planes and chisels may give great results, but will also take many hours of practice.
Building the body
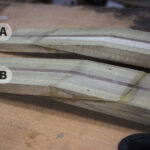
The body will most often be made of at least two pieces of wood glued together and may also require a top layer from two or more additional pieces. I will assume that we are starting from lumber that is roughly at the size and thickness you need so chainsaws and industrial size planers and saws are not part of tour process. Some preparation, cutting, gluing planing and sanding will be necessary. I am also aiming for a somewhat traditional wood-based guitar body and neck. There is a wide range of variations of wood types, sizes, layers and shapes but the same tools should cover the vast majority of them.

1. A Jig Saw
Probably the first electric saw I ever used. Not exactly a precision tool, but in most places in the guitar, there is going to be further finessing, scraping and sanding anyway. Other than a large and relatively expensive band saw, the jig saw is a simple and comfortable solution for cutting irregular shapes such as a guitar body or headstock.
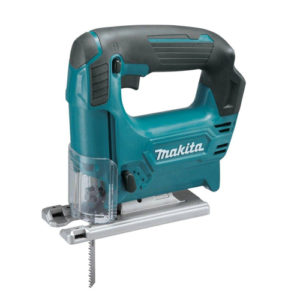
With a parallel ruler or jig you can also cut straight lines. There are also different length and quality blades you can experiment with for different thickness and density of woods.
2. A drill
Goes without saying, a hand drill is necessary for making holes and drilling starting points for routing cavities. These will include pilot holes for screws holding anything from the bridge or pick-guard to a bolt on neck. You may also need to drill the holes for the tuning machines, dot inlays strings and electric wires.
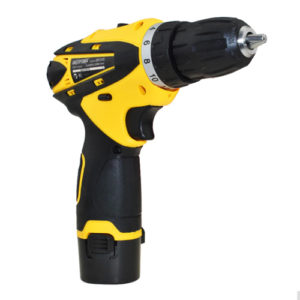
Having an additional press drill or a mount for the manual press, but since you might also have to do some non-vertical drilling if you only have one drill it should be a manual one.
TIP: Create a small Jig for drilling 90 degrees holes by taking a square block of about 1.5” and cut a quarter of it out to get a 1.5” L shape. The inner corner can be used as a guide for Vertical drilling
3. Drill Bits
Different guitars will require different size holes according to the build and hardware. A standard drill set that fits your measurement method of choice (metric or imperial), should be a good start, but there are always a few specialty drill bits you will also need. One especially long drill bit is useful for wiring (often drilled diagonally).
A 25mm or 1” (or even larger) drill bit will be handy for creating a good starting point before routing out cavities for pickups or other electric components. A Self-Feeding drill bit will give better and cleaner results than the ‘butterfly’ bits, but will cost significantly more.

4.A Planer
Planers are one of the most useful tools with traditional luthiers and being skilled with one will give you great results and even save you time on sanding and other shaping tools. There is a wide variety of sizes and shapes but a good medium sized manual planer is a good place to start. When gluing two or more pieces of lumber to form the body, you need to have 90 degrees between the face and the edge of your pieces.
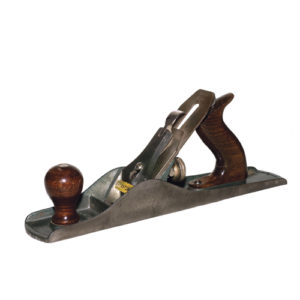
If you don’t have access to a planer jointer or an electrical planer, a manual planer should do just fine.
5. An Orbital Sander
Building a guitar involves a lot of sanding and going the manual route will require a lot of time and effort. There will often be no way to totally avoid some manual sanding but I like to ‘save’ it for the finishes and the final touches and use power tools for the rougher parts. There is no one tool fits all sander, but I find the orbital sander as the most versatile and the one that will save me the most amount of work.
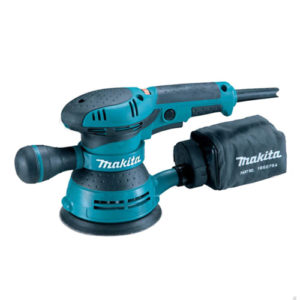
It’s great for the larger surfaces and edges. With a low grit sandpaper, it can also be useful for rougher shaping. A Spindle sander will be the next one on my list and a form of stationary belt or disk sander (or a combination) would be the ones after. The benefit of the spindle sander is that it gives you 90-degree edges and it can perfectly sand those cutaways the orbital sander can’t reach.
6. Clamps
Clamps are essential for gluing and holding things down for drilling, cutting, routing and many other tasks. Sure, a good vise or a carpenters table with ‘dogs’, but the versatility and ease of clamps is unparallel. The answer to the question ‘How many do I need?’ is always ‘MORE’. You probably need at least four for gluing the body’s two to three parts (with length to match) and two to four more for later gluing the neck to the fretboard.
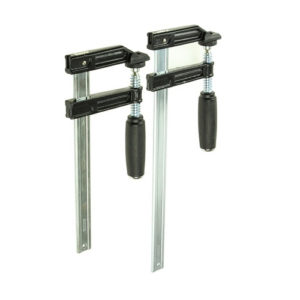
Size usually correlates to the strength. There are many types and styles of clamps and the prices vary accordingly so experiment according to your budget. Cheap ones will usually do the job but will be rougher to work with.
7. A Router
There is probably no other tools which will do a variety of very different jobs on so many parts of the guitar such as the Router when all you need are the right Bits. A good handheld router (with a template) will help form the shape or the body, round off the edges or create the crease for the bindings, create the cavities for the pickups and the electronic parts, the Truss-Rod groove, the neck tenons or pocket and even roughing the neck profile.
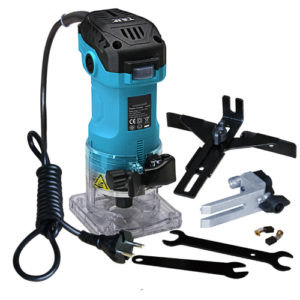
Routers range from small ones you can hold in one hand to monster plunge routers and of course table routers and the larger Pin Routers. If you are getting just one, a medium size router would probably give the best all around solution. If you can find one with a plunging option or attachment, that will be a bonus. Remember, can always mount it upside down on a table and have an improvised table router. Routers are very fast turning and demand caution when operating. They can have quite a ‘kick’. Newer/ better models have a mechanism to avoid that and are recommended if you have no experience with routers.
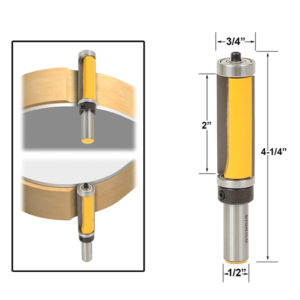
8. Router Bits
A router’s function is defined by the bit attached to it. You can get a general set to experiment and play with, but there are a few bits not available in standard sets, which are key for guitar building. As a rule of thumb all bits can be used with a manual router but when working on an edge it is more comfortable and safer (both for the wood and the operator) on a table or a table mounted router.
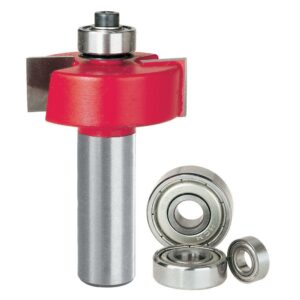
Flush Trim bit (Template Copier) – This bit has a pilot bearing that helps you follow a template and cuts an edge to the exact shape of template. Great for trimming any part of the guitar you have a template for as well as cavities. For on making your own Templates, see “Electric Guitar Templates – The complete guide”
Round-over Bits- These follow an existing edge with a bearing while trimming and rounding the edge. They come in different radii to match the design you want. You can round the edge of the body and with the right profile blade you can even round the back of a neck.
Rabbeting Bits- Perfect for creating the indent for bindings on the body, neck or headstock. Resemble the flush trim but come with bearings of different sizes to control how deep the cut will protrude.
See more on Router bits in “Useful Router Bits for Guitar Building and How to Use Them”
Building the Neck & Headstock
The neck is a fairly complex piece of carpentry and requires cutting, routing, shaping, sanding gluing, drilling and more.
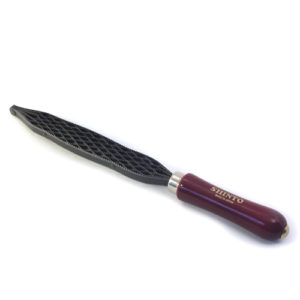
9. A Saw Rasp
When you need to remove relatively large amounts of material without using power tools (for safety or budget reasons). Carving the neck shape as an example. The rasp is very coarse but being manual can be relatively safe and accurate.

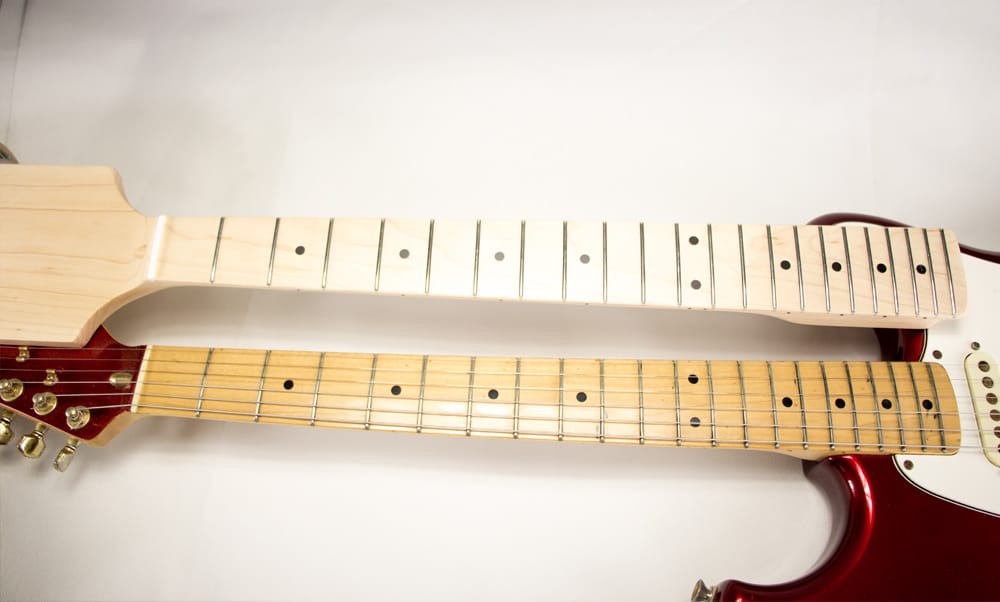
The Fretboard/ Fingerboard
The fingerboard requires a few very specific tools in order to get the correct radius, cut the slots for the frets and install the fret themselves. After fretting you will probably need to level, re-crown and polish them as well.
10. A Radius Sanding Block
They come in various radii. No need to get a whole set, just get the one/s you plan to use. Achieving the correct radius for the fingerboard can be done with a sharp plane, but will require a very steady and experienced hand. The easier solution is getting a radius sanding block and working your way from rough to fine grit.
11. Fret Bending Jig
Frets can be pre- bent and pre-cut but if you are buying in bulk, you will need to bend the frets to match your fingerboard radius. Many Luthiers prefer to bent the frets to an even tighter radius than the fretboard so that the middle part has to be forced in. This is done to avoid the tips accidentally being pushed up when the mid-section is hammered in.
12. Fret Slotting Saw
Most Saws will not match the fret’s Tang thickness. Any deviation from the correct position could throw of the intonation. You may choose to spring for an expensive jig for fret slotting, build one yourself or just cut them manually and carefully. Those jigs become very handy when you are trying to produce a number of guitars.
13. Fret Hammer
Hammering on the frets should be done with the right force and material as not to bent or dent the fret itself. Another option is some sort of fret press which forces the frets in in a more uniform manor. There are a few different types and there is always an option to make your own fret press jig.
14. Fret Cutter
Even if bought pre-cut, there is always a tip that needs nipping without damaging the shape of the fret. The main difference between this cutter and others is that the cutting happens very close to the tip of the cutter so there is little to no leftover fret to file.
15. Fret Angle file
For simply filing the edges of the nipped frets to the right length and a consistent angle. This is not the final treatment we will give the frets, but it will give us a good starting point.
Fret finish and Re-crowning
Chances are the frets will not come out completely level and some leveling followed by re-crowning and polishing will be necessary. This process is quite similar to reviving somewhat worn out frets (not to confuse with re-fretting) or a cheap neck. I go into the actual process in detail in “Buy a Cheap Guitar Neck and Make it Amazing“
16. Fret leveling Beam
Basically, a long flat sanding block. You want to be able to sand many frets at the same time to achieve complete leveling. This is usually an aluminum profile with adhesive sandpaper on it. They come in a few lengths for overall or more localized leveling. They will also have varying grit of sandpaper (often on different sides of the same beam) to work from rough to fine. There are also files which do much of the same thing and will last much longer. They are more expensive, usually come in one size and one grit.
17. Re-crowning File
Filing the frets back to a round shape can achieved meticulously with a flat or triangular file (caution should be taken to not scratch the fretboard), but there are special concave files which make the job somewhat easy. They can be diamond coated or ‘regular’ files, and it’s really a matter of personal preference and technique which one you ultimately stick to.
18. Fret Erasers
There are a few ways to polish frets, including steel wool (terrible with magnets in the area) and polish compound which can be messy. Fret eraser are a simple and easy solution, which can also be handy after periodic cleaning of the fretboard. They also come with a few grits (the colors are not just a design choice) and you work your way from the relatively coarse to the finest.
19. Nut slotting
Regardless of the material you use for your slots (unless it has an adjusting mechanism) the slots have to be manually slotted to the correct depth and width to fit the strings gauge and action. These range from thin, grooved stainless steel needles to a full professional set of files.
20. Solder Iron
This is where you will need to venture out of the realm of carpentry. There is no way around it (unless you going for an acoustic guitar) and you will need a solder iron, solder wire and preferably a form of flux.
Finishing
There are many ways to finish a guitar and you can have a different finish for different parts of the same guitar. In most cases the first step will be smoothing the wood itself to a very fine finish. After that there will be some sort of coating and/or staining and then maybe a transparent lacquer or polish. An oil finish with different application is also an option. Some of the oils can be applied with a rag (a brush is usually not the first choice) but most paints a coating are best applied by spraying. You can get decent results, after some trial and error, with spray cans, and there are some dedicated ones on the market but if you want to step it up a notch and also allow yourself a larger range of colors and coatings, a spray gun is the way to go.
21. Sandpaper
As mentioned before, there will be a lot of sanding in the process. If you opt for an orbital sander you will need matching disks (usually the 8 hole 5” discs) of around 60-600 grits. There are packs of assorted grits. I often use them manually in those hard to reach places. However, for the higher grits and between coats I personally prefer the sanding sponges which are easier to hold and can work with wet or dry sanding. They are slightly more expensive than regular sheets of sandpaper and also come in packs of assorted grits.
22. Electric Paint Spray Gun
Buying an air compressor and a spray gun is often not cheap and also takes up significant space. A simpler solution is an electric spray gun. It will give you better control of the spray pattern and with some trial and error should give great results.
General tools and equipment
Regardless of the parts, tools and techniques we are about to get into, there are some tools and glues which will accompany us through the whole process.
Measuring Tools
Accuracy is one of the things you don’t want to compromise about. If the positioning of the frets, the guitar scale or the action are off, you may never be to properly tune and intonate your guitar and regardless of how beautiful it came out, you will not be able to play it.
23. A Long Ruler
You want to have ruler of at least the length of your fretboard and preferably the full scale. 70cm or 27.5” will suffice for all standard guitars (90cm – 35.5” for a bass guitar). If you find one that is sturdy enough it may also double as straight edge.
24. A Straight Edge
When you need to check if any part, such as neck or fretboard, or the action height, is really straight, there is nothing like a real straight edge. Basically, it’s an accurately machined metal profile which is thick or strong enough to not bend with manual pressure. There is no real parameter it needs to adhere to other than being straight. I had a friend who works in window installation bring me a leftover aluminum profile which works just fine.
25.A Square (90 degree) Ruler
Other than a straight ruler, the Square Ruler is one of the most common tools for marking and keeping thing consistent. Your frets, nuts, pickups and bridge (with exceptions) are all square to your guitars center line. The edges, and gluing edges, are also square.
26. A Digital Caliper
Calipers are very handy for measuring smaller parts, thickness and depth very accurately. The price for a decent digital caliper today is very reasonable and makes those fraction of centimeter or inch much easier to handle.
Glues and Tapes
27. Carpenters Glue
For joining any two pieces of wood to a stronger than wood connection simple carpenters glue is a must. Whether you are gluing parts of the body, a top, the neck, laminates or a scarf joint for the angled headstock this is the glue of choice for most jobs. If you want to be more particular there a ‘shades’ of strength and speed of curing.
28. Super Glue
The ‘go to’ for quick and strong connection. Very handy for more than part of the guitar including some emergency fixes. Used for Frets, Nuts, Binding, Inlays and more. Some even use together with other glues to get a quick grip. Mixed with fine saw-dust it can make a very strong filler for holes, cracks or small dents and scratches.
29. Masking tape
The obvious choice for painting and finishing, but also practical for fingerboard work, binding and more. Get it in both thin and thick variations.
30. Double Sided Tape
Many guitar builders have a love-hate relationship with double sided tape. You need it when routing with templates and it’s a handy way to hold down parts while leaving the top ‘clamp free’. On the other hand, it is sometimes a pain to remove when you are done (especially if you were generous with it) and is prone to accidents, if you haven’t used enough. The cheap ones have less grip and are harder to remove, the expensive ones are better but expensive.
Substitute: Instead of double-sided tape is taping masking tape to both sides and then super-gluing them to each other. You essentially get double sided masking tape.
Guitar Specific Tools and gauges
31. A Notched Straight Edge
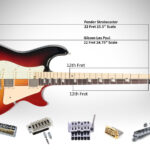
When checking the fingerboard after it has been fretted you will need the Notched Straight Edge. A regular Straight Edge will measure the frets, where the notched one will skip the frets and sit on the board itself. Most of them come with one side notched for a 24.75” (628mm) scale, fitting Gibson Guitars and the other side notched for a 25.5” (648mm) scale for most Fenders.
32. Radius Gauge
The best way to check if you have reached the radius you are going for. Also, useful when setting up the guitar. There are a few types but for the difference is more apparent for setup than building a guitar.
33. Fret Rocker
For checking the if your frets are really level, you have to check each combination of three consecutive frets from nut to the last fret, preferably in three places. The fret rocker has five edges in lengths to fit any location on the fretboard.
Inlays and Decorations
I will not go into inlays in the ‘Must-Have’ list as it is a Pandora’s box of tools and techniques depending on materials and designs. Fine inlays are an artform of itself.
Conclusion
There are of course many more tools and variations and when it comes to expanding and improving your collection, ‘the sky is the limit’. I do feel however that with this list you can take some lumber and hardware and build an electric guitar.