If you are skipping (or maybe have already done it) building a guitar kit and you are ready to jump into the deep waters of Lutherie, you must be asking yourself: How do I approach building an electric guitar from scratch. There are many options considerations, parts, techniques and tools involved.
In order to build an electric guitar, you will need to go through a little checklist:
- Decide on the type of guitar and specs you want to build
- Plan the guitar according to those specs (a lot of numbers and measurements)
- Make sure you have or acquire all the parts, materials and tools you need
- Learn the building techniques and tools you may not be familiar with
- Have fun and build an electric guitar!
There are going to be a lot of options ahead of you and many little details you may have not ever considered before. In the following article I am going to try and walk you through everything you really need to know, consider, learn and buy to get your guitar building project on its way. At the end I’ll give you a (not so) little checklist so by the time you are done you we will be on your way to get started.
What type of guitar do you want?
This question can be divided into two main aspects, visual and practical.
On the esthetical side of things, you may already know exactly what your dream guitar will look like, you may want to make a replica of your favorite guitarist or the one that changed your life. In that case it will all be a little easier to figure out as it already exists and you just need to find the right specs and measurement. (Read on, they may actually be here). Where it gets tricky in when you either want to customize ‘just a little bit’ or go all in and create a completely original design.
On the practical side you may already have a concept of what type of neck, scale or pickups you want, what type of sound you are aiming for and the type of guitar that feels best to play. Eddie Van Halen created his famous ‘Franken Strat’ because he likes the Stratocaster, but wanted to upgrade it to his own need. Steve Vai took it a step further and designed a guitar from the ground up according to his desire and together with Ibanez created the ‘Superstrat’. You can mix and match parts, styles a specs to create or experiment with whatever you like.
Body and Neck Material
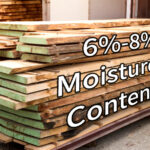
The material the guitar is made of makes a big difference to how the guitar looks, feel and sounds. Without getting into exotic materials the question is usually around what type of wood to use. (much more info in ‘Guitar Wood Types – Explained’)
The most commonly used woods are Mahogany, Maple, Ash, Alder, Basswood, and Poplar, with Darker types such as Rosewood and Ebony used for fingerboards. With your own build there are no hard and fast rules although it is advised to steer clear of softer timber such as pine and very hard ones like Oak or the Brazilian Ipea. The latter are just so hard, it’s a pain to work with. There are environmental concerns as well and some types of wood are getting harder to find with alternatives becoming more common.

Specs!
So, you figured out what you want the guitar to look like. Now find the specs that match your passion, your whims, your budget and the skill of whoever is going to play it. If you’ve ever looked at all the specs of any guitar, you may have been blown away by the amount of details. But all these details are exactly the ones you are going to have to figure out and decide on. Scale length, number of frets, type of frets, neck thickness, neck shape, fretboard radius, pickups, strings, electronics and lots more.
WARNING: We are going to have to really ‘geek out’ with numbers, measurements and little details, so pick and choose what you need and bear with me. You can’t guestimate your way out of this part.
Some of the specs have to do with comfort and are totally subjective, and other will have more to do with the sound of the guitar. Without getting into ‘tone-wood’ and its effects the two factors that will affect the sound of your guitar most are (arguably) the guitar scale length and the pickups.
Scale Length
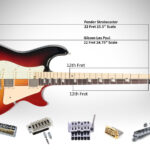
Scale length is the playable part of the string, meaning from the bridge to the nut. Since the bridge is often adjusted for intonation, the accurate way to check or define scale length is twice the distance from the nut to the 12th fret. As a general rule longer scale length will require higher tension for the same note/pitch and produce cleaner, ringing tone, where shorter scales will tend to have slightly thicker sound. On the playability side of thing it’s obvious that short fingered guitarists will feel more comfortable with shorter scales but bending strings will also be easier (with identical strings).
For comparison, here are some typical scale lengths:
- 22.5 (572) – AKA ¾ scale some Fender Mustang and Duosonic (see ‘Why Not Build a Badass Electric Guitar for your kid?’)
- 24” (610mm) - Fender Jaguar and Mustang Brian May’s ‘Red Special’
- 24.5” (622mm) - PRS (Santana)
- 24.75” (628mm) - Most Gibson models
- 25” (635mm) – Most PRS models
- 25.5” (648mm) - Most Fenders Strtocasters and Telecasters as well as Ibanez, Jackson and Schecter
Longer scale length is mostly used for 7 stringed guitars with 26.5” (673.2mm) and ‘Baritones’ with up to 30” (762mm). Standard base guitars use a 34”(863.6mm) scale.
What about multiscale or ‘Fanned Fret Guitars’ guitars?
These are usually used with 7 or 8 stringed guitars to compensate for the lower strings’ tension. If the lower strings didn’t get the extra length they may not have enough tension and would Buzz a lot. I would steer away from ‘fanned fret’ guitars for your first project, lets start with the ‘simple’ stuff.
Does the fret placement change for every scale?
Yes. Since the scale is double the length of the distance between the nut and the 12th fret by definition, the distance of the frets will always be relative to the scale. There is a very simple yet annoying formula to calculate the distance between frets, but I have created a few charts for common scales.
You can also download these and more charts and print it for your convenience.
It is always advisable to measure each fret from the nut and not from the last fret, so if there is a slight error it will not be compounded to all the following frets.
How many frets would you like?
I have included 24 frets in all my charts, just in case, but do you actually want or need 24 frets. Just as an example, most electric guitars have 22 frets but lately production guitars such as Ibanez, with their ‘Superstrats’, Music Man John Petrucci and Steinberger started offering 24 fret Necks. Is more, better? Is there a downside to those two extra frets? Actually, there is. Those two extra frets will push your neck pickup towards the bridge and away from the center of the string resulting in brighter sound for the pickup that is supposed to be the thicker and warmer one on any guitar. Most guitarists would probably still prefer the 22 fret setup, but if you play like Steve Vai and bending the at the 22nd fret is just not enough, than by all means go for 24.
Fret Size
Not all frets are created equal. There different sizes and different materials. You can also buy them shaped and pre-cut. Frets have to main parts: the crown which is the round part we play with and the tang which is embedded in the fingerboard.
Fret height is more significant to the feel of the frets and the playability. Higher, or ‘Jumbo’ frets make bending and shredding easier and a light touch should be enough to produce a clean sound. With a light touch you may never even touch the fingerboard. The downside is that if you do have a heavy hand and tend to press the frets hard, you will be pulling the intonation slightly up every time. The medium to lower frets do produce an overall smother feel when running your hand on the neck. It’s mostly a personal preference that fits the playing style. Medium height frets are in the range of 0.042”-0.047” (1.067- 1.194mm ) and the Jumbo ones will usually tower to 0.05”-0.058” (1.27- 1.47mm). Most production guitars will have medium frets.
Fret Material
Most frets are made from a material called ‘Nickel Silver’ but you can also fit your guitar with stainless steel frets. The benefit of the stainless still frets is durability and longevity. Some people say that they also sound a bit cleaner but if there is a difference it is probably more in the way it feels. They will remain smoother longer and allow smoother string bending.
Pickups
Pickups will have a huge effect on how your guitar sounds and although this seems like a big decision to make, they also have the added value of being the easiest part of your guitar to replace enabling some of the most drastic and yet cost-effective upgrades to any guitar. The pickups are the part in the guitar which receives the magnetic vibration from the string and converts it to electricity. The basic structure of the pickup is a row of magnets (one for each string) with a wire wrapped around them thousands of time. This basic structure forms a single coil pickup.
Types of Pickups
Up until 1955 all pickups were single coil and their main problem was a low noisy, electrical hum that accompanied the playing. Gibson were the first to introduce the Humbucker which were to coils with reversed polarity which cancelled that Hum (hence the name). They also gave a fuller heavier sound than the single coils. A few decades later pickups still rely on the same principals but have evolved to offer many variations.
Active Pickups: These Pickups are actually amplified within the guitar with the aid of a battery, unlike regular, ‘passive’ pickups which rely on the magnets and the strings’ vibration. This allows them to both allow for higher and easier distortion and also maintain power with longer cables
High output Pickups will give higher output without the aid of a battery and will tend to distort very easily with almost any amplifier.
Vintage Pickups: Pickups that try to mimic the character of the sixties and seventies. They are usually passive, low output with a tendency for softer tone matching magnets of the era.
Pickup Number and Position
The number and position of your pickups will also have a dramatic effect on the sound your guitar makes. Since string vibration will have smaller amplitude the closer you get to the bridge, the pickups will respond differently. The same pickup will give brighter, more metallic tones the closer it is to the bridge, and thicker, darker ones the closer it is positioned to the neck. The Les Paul has almost similar pickups in the bridge and neck position and calls them Lead and Rhythm respectively, to give a cleaner brighter sound to the Lead and fuller, warmer sound to the Rhythm.
Pots and Switches
In most cases a two pickup combination will have ha 3-way switch and a 3 pickup setup will use a 5-way switch. With Pot (Potentiometers) for Volume and tone you have multiple possible combinations and there are countless ways you can wire the same set of pickups. The one thing you do want to consider is that the type of pot you use can also make a difference to the sound of the pickups. Generally speaking, a higher value 500k pot would give cleaner, brighter sound than the 250k pot. Strats will usually come with 250k pots to complement the already clean tone the single coil pickups give and Gibson guitars will use 500k pots to give get more the high tones with their naturally warm humbuckers. Stratocasters will typically have 2 tone knobs and one master volume whereas Telecasters make do with one tone and one volume knob. Gibson will have 2 tone knobs and 2 volumes, one for each pickup.

There many more modifications and upgrades you can make to your electronics but we’ll stick to the basics.
The Neck
Neck Connection: Most Guitar will be either a ‘Bolt-on’ neck much like Fenders, or a ‘glued on’ or ‘Set- Neck’. From a practical point of view the bolt on would be easier for a beginner as is leaves more room for error and correction, but if a Les Paul style guitar is what you like, then it’s time to figure out those tenons and angles. Another option is a ‘through neck’ where there is one piece running along the full length of the guitar and most importantly from the tuners to the bridge. That means that both strength wise and construction wise, all dimensions, scale length, neck connection and neck angle are taken care of from the build itself. Deciding on a neck style will have a big affect on the build process.
Neck width: Aside from looks, style and sentimental issues the width of the neck is very much a matter of comfort and personal preference. In most guitars’ specs the Neck width at fret 01 is the same as Nut Width. Most Fenders are 1.650″ (42 mm) and 2.1875 (56mm) at the heel with slight variations for specific models 1.687” (42.6mm). Gibson’s Necks tend to vary more through the years and the models. A standard Les Paul today would be 1.687″ (42.85mm) at the nut but you could find models up to 1.795″ (45.993mm) a few years ago. The Ibanez JEM boasts a 1.7” (43mm) neck width at the neck. This is the range where most guitars are at. Chances are, you would not want anything thinner, even for a child. However, if you are building the guitar for someone with exceptionally beefy fingers, you can always make a custom nut and go for an extra wide neck. Classical guitars use 2.04” (52mm) nuts, just for comparison.
Neck Profile and thickness
The profile and thickness of the neck effects much of how it feels in the players hand. The three dominant profile shapes ar ‘C’, ‘V’ and ‘U’. ‘C’ is practically round and is what most guitars have. The ‘U’ profile will have a slightly flatter center and will give an overall bulkier feel. The ‘V’ will have a pointier center and give an overall slim feel. Then there are all the variation between those three called ‘soft’ or ‘hard’. For custom guitars you can also choose a non-symmetrical shape to fit someone’s preferred shape. It’s hard to associate a certain type of guitar to a typical neck as there have been many variations of these profiles through the years even on same models of guitars, and no one profile lends itself to a style of guitar or playing.
Fingerboard Radius
All fingerboards have a curvature to better fit the natural shape of our hand. This is the fingerboard (or fretboard) radius. The bigger the radius the flatter the fingerboard. It makes no difference to the sound but a big difference to the feel and comfort of the player. Aside from the usual ‘personal preference’ there are also a few points worth mentioning. Smaller radii are considered more comfortable for playing chords and will lend themselves to rhythm guitars. The flatter ones are favored by shredders and other fast lead players. Bending strings will be slightly easier on large radius and will tend to buzz more in extreme bends on a small radius guitar. Starting from the smaller radius Fender takes the lead with a tiny 7.25” radius for most of early guitars. They only switched to a 9.5” radius in the 80’s and still make them on the majority of their guitars, and are still the company with the tighter radius fingerboards. Gibson have been very consistent over the years and have a 12” radius on pretty much all models. Most other manufacturers use different radii on different models, ranging from 10” up to 16”. Ibanez has some of the flatter production necks with as much as 16.9” radius on Steve Vai’s signature JEM. Let’s not forget compound radius guitars which try and combine the best of both worlds with a tight radius at the nut, for rhythm, and a flatter, large radius at the bottom of the fretboard for soloing.
Fingerboard Inlays: Whether you choose to have standard dots, the classic Gibson squarish ‘Mother of Pearl’ inlays or if you choose a more creative shape or material, you are probably going to have some kind of marking on the fingerboard face and side.
Fingerboard Binding: Not all guitars have bindings, but if you like the look of bindings you can have it on the body, neck and headstock. Colors are traditionally white, cream, or black and you can also play with multiple colors and layers.
Hardware Color
In most cases you will want your bridge and tuners to match in material and color. If it works out you may want them to fit the color scheme of the nut, the knobs and maybe the pickups or the pickup covers/ rings.
Bridge Type
The first decision to make when choosing a bridge is tremolo or not. Whether it’s a more standard Stratocaster whammy bar or the sophisticated Floyd Rose, the routing of the body, the installation and setup is very different from any fixed bridge. If you are going for a simpler fixed bridge it is also important to note which one. A standard Gibson style Tune-O-Matic will probably sit much higher off your guitar and may require different neck angle. That will be important to know or you may be stuck with very high action or too low for your setup.
Nut Type and Material
Most guitars come with standard plastic but you can choose any other Nut type or material. You can choose between traditional more natural materials such as Ebony (or other hard woods used in many stringed instruments), bone or Ivory (hard to get by and not as popular for environmental reasons). The natural material are slightly softer and may be less consistent in density (being natural). They will also tend to add a softer sound and less sustain. The man-made materials include the plastics, metals and the locking nuts. Another option is a zero fret where the actual nut acts a mere guide to the position of the frets and will have less, if any, contribution to the sound and pitch. Metallic, locking nuts (metallic as well) and zero frets will tend to affect the tone to a cleaner brighter sound which will also be more consistent with the frets. If you are going with a Floyd Rose or comparable bridge, you will probably opt for locking nuts as well.
Tuners – Machine Heads
There are many choices, as far as design goes other than going for locking or regular ones the choices are mostly between different colors, materials or vintage.
Checklist
(You Can Download a Printable Version Here)
Style: Stratocaster/ Les Paul/ Telecaster/ PRS S2/ Gibson SG/Ibanez JEM/ Gibson ES-175/ Other
Body: Full body/ Semi Hollow/ Hollow/ Archtop/ Other
Cutaways: Single Cutaway/ Double Cutaway/ Other
Neck: Bolted/ Glued/ Laminated/ Inlays/ Bindings
Headstock: Single sided/ Double sided/ flipped/ Other
Color and finish: Natural, Tinted, Sunburst, opaque color/ Other
Body Material: Mahogany/ Maple/ Ash/ Alder/ Basswood/ Poplar/ Other
Neck Material: Mahogany/ Maple/ Ash/ Alder/ Basswood/ Poplar/ Other
Fingerboard Material: Rosewood/ Ebony/ Other
Sound: Clear/ Deep/ Twingy/ Throaty/ Vintage/ Other
Specs
Scale Length: 22.5 (572mm)/ 24” (610mm)/ 24.5” (622mm)/ 24.75” (628mm)/ 25” (635mm)/ 25.5” (648mm) / other
Number of Frets: 21/ 22/ 24/ Other
Type of frets: Medium/ Jumbo
Fret Material: “Nickel Silver’
Pickups:
Number of Pickups: 1/ 2/ 3/ More?
Pickup type: Single coil, Humbuckers, Mix
Pickup style (color): Chrome, Gold, Black, White, Cream, other
Pickup character: Active, Passive, Vintage, High output
Control Knobs:2 volume, 2 Tone
Switch: none/ 3 way, 5 way
Neck width: 1.687” (42.6mm/ 1.687″ (42.85mm)/ 1.77″ (45mm)/ other
Neck Profile: C/ V/ U/ non-symmetrical/ other
Fingerboard Radius: 7.25”/ 9.5”/12”/ 14”/ Compound/ other
Fingerboard Inlays: Dots/ Squares/ Other
Fingerboard Binding: White/ Black/ Cream/ Other/ None
Hardware color: Black/ white/ cream/ brass/ steel/ other
Bridge Type: Standard Tremolo (Strat-like)/ Floyd Rose/ Bigsby/ Hard Tail/ Tun-O-Matic/ Other
Nut Type: Plastic/ hardwood/ bone/ metallic/ locking nuts/ Other
Tuners: Regular/ Vintage/ Locking/ Other

Don’t ‘wing-it’, Plan It!
It’s important to get all your ducks in a row before you get started. Different parts require different measurements and techniques. If you just start building and hope it all turns out right you may run into all kinds of problems/ Some maybe easy to fix but some may require serious modifications or to just start from the beginning. Depending on the parts and hardware you use, such mistakes can also be expensive. And at the end of the day you may want the guitar to look good, but it also has to play and if you mess up the dimensions you may render it unplayable.
The old saying ‘Measure, Measure, Cut’ applies here.
Do I buy it or do I make it?
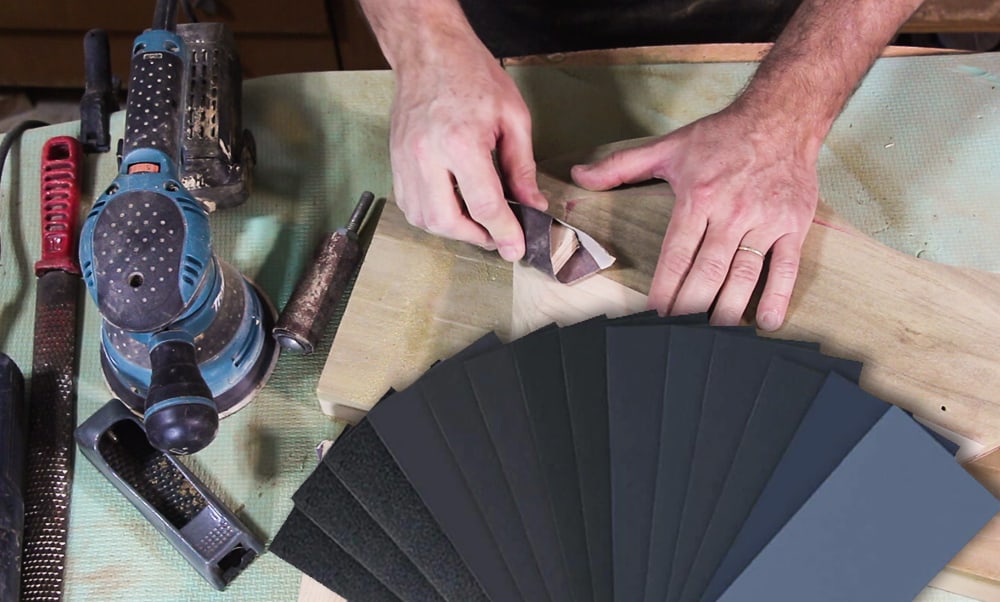
Whether you have a decent workshop, or just a basement with a drill and a jig saw, you will probably need some very specific tools for guitar building. If you are thinking of building a guitar, I am guessing doing the ‘work’ is an incentive and not a deterrent. The question is always how far do you want to take it. That can be true to the tools you are going to be using and even to some of the guitar parts themselves. I, for example, enjoy making tools and jigs which will help in specific tasks, (like building a disk sander from an old grinder) but have no ambition to wind my own pickups
You have to know what you don’t know.
An electric guitar build requires a few different skills and techniques most people and not all DIY hobbyists poses. Basic carpentry is a given, but even if you built dozens of tables or cabinets, fretting may be tricky. Understanding electrical drawings and welding may also be something you may not be experienced with.
The many hats of the Electric Luthier
Building stringed instruments, Lutherie, is an art of itself and I personally tip my hat to anyone who can build a decent violin or a good acoustic guitar. While some aspects of carpentry may be slightly simplified (Thank you Leo Fender), you now have the added complexity of the ‘Electric’ part of it.
Tools and techniques, you will need to have and master:
There is usually more than one tool to perform a certain task and the tool you use has a lot to do with personal preference and your budget. You can read much more about Luthier’s tools in “The Ultimate Guide to Electric Guitar Building Tools” ( http://72n.390.myftpupload.com/the-ultimate-guide-to-guitar-building-tools/)
Basic body and shape
This is where the carpentry part takes place. You will start with preparing the lumber, cutting, planing, jointing and gluing the parts into their desired size. Then there will be rough cutting of the shapes according to a drawing (in full scale) or a template (preferable). You can use a band saw; a Jig saw or a variety of hand saws to get the job done.
In many Gibson inspired guitars your neck and headstock will need to be angled using a scarf joint
After roughing out the shapes you will need to shape and refine it. This is where routers (table or manual), planes, files scrapers and various sanding tools come into play. The better the tool fits the task and your skill level the better and/or faster the result will be.
The size and position of your pickups, controllers and knobs will also be determined here and cavities and holes will need to be drilled and routed to fit them. Covers or pick-guards should also be taken into account/

The Fretboard
To the espiring Luthier the fretboard can be a project by itself. Shaping the correct radius, cutting the slots for the frets (slotting), positioning the frets (fretting), cutting, filing, leveling and polishing the frets. This where there are some tools you will probably not have. A fretting saw, a fret bender and a fret hammer may be enough for fretting. You will also need a sanding beam or file for leveling and some type (there are a few) of file for re-crowning and fret eraser, steel wool and/or polishing paste for finessing the frets. More on neck finishing in “Buy a cheap guitar neck and make it Amazing” (http://72n.390.myftpupload.com/buy-a-cheap-guitar-neck-and-make-it-amazing/)
Extra touches
Many models, surely custom guitars, will have either, binding on the body, neck or headstock, logos, emblems or inlays embedded. All these decorations will also require extra time attention and tools. Being small and delicate they often require more time and attention than an unexperienced person would expect and you can’t rush through them, it will show.
Color and texture
Ones the fingerboard, the neck and the body have been assembled it’s time for finishes. You may opt for an oil finish, satin gloss or high gloss. Maybe go with natural color, a sunburst or an opaque color. This stage will also require time and patients. There will probably multiple rounds of layering drying and sanding with variations according to the method you use. You may be using a compressor with a paint gun, an electric version or a rag for applying oil, depending on the application type. Sanding paper for wet and dry sanding of grits from 400 and up will also be needed. Buffering pads and compound will also be used if going for high gloss finish.
If you are building a guitar with a bolt on neck, you may choose to finish the body and neck separately.
Putting it all together
After the paint, oil and lacquers are dry, it’s time to install the pickups, the electronics, the rest of the controls, the bridge and the tuners (machine-heads). By now you should have done all the drilling and routing to put everything in place so aside from the soldering you will mostly need screwdrivers, keys or hex/ allen keys. For soldering you will need a soldering iron, lead and preferably flux in liquid or paste form.
Conclusion
Make all the decisions, gather all the information, get the materials and buy all the parts you need. Use the checklist to guide and plan all the little details and learn what you don’t know yet.
After all that theoretical information, go on, have fun and build guitars.