Guitar and guitar necks come in various shapes and sizes which will make for different feel and sound when held or played. One of the parameters is the fretboard or fingerboard radius. This is where are radius gauges come into play.
There are a couple of main uses for the Radius Gauges
The first one is for checking the and adjusting the radius of the fretboard during the guitar construction, where we hold the Radius Gauge against the fretboard and look for spaces or bumps in order to eventually match the desired radius. The second time we us the Radius Gauge is when setting up the guitar with the string on it. At this point we are actually holding the Gauge against the strings themselves to see that they are matching the radius of the fretboard both in the nut area and the bridge.
Not to be confused with the profile of the neck, which is the back side of the neck, the guitar radius deals with the fretboard/ front side of the neck. Unlike classic Spanish guitars which have a practically flat fretboard, electric guitars tend to be round to some degree and have a radius. The radius refers to the sideways curvature of the fretboard as if it was a full circle. the larger the radius the flatter the fretboard will be.
When talking about Fretboard radius and Radius Gauges we will also want to understand the reasons behind picking a radius for your guitar and the types of Radius Gauges available.
How do we use it then?
Part of the method has to do with the type of Radius Gauge you are using and we will get to that in a bit. for the first part you would use the much in the same manner.
Shaping the radius of the fingerboard
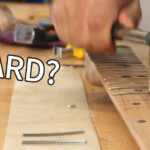
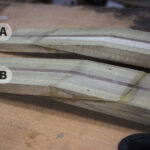
Regardless of the preferred curvature, your finger board will usually start as a long flat square. At this point you will need to shape it to the desired roundness using a planer, a radius sanding block or a router with a customized jig or bit. You will gradually shave off more and more material, mostly along the sides of the fingerboard. Gradually a round hill will be formed in the middle. Select the Radius gauge with the radius you are aiming for and place on the fingerboard. Center it and look for gaps and bumps between the Gauge and the wood. Do this as often as you need. Remember we can always sand more, but we cannot add material, so make sure you don’t overdo it.
Tip: Use a reading lamp or other light opposite to where you on are on the neck. Looking for the light shining in the small gaps makes it much easier to spot.
Other than the very rough removal in the beginning of the process it is advisable to work with a long radius sanding block. The longer ones will give a more consistent radius along the length of the fingerboard and also maintain the center better. Strat with lower grit sandpaper and work up. Once you can put the radius Gauge at any point and there are no gaps at between the wood and the gauge, you ar pretty much done. You should also check lengthwise with a straight edge to make sure you did not ‘dig’ into any spot (usually happens if you put too much pressure in one area with a short sanding block), but other than that it’s mostly just fine frit sandpaper. Any Grit above 800 shouldn’t really be making any diference to the shape but just smoothing, so for the final stages of smoothing the fingerboard you should need the gauge anyway.
Using the Radius Gauge for guitar setup
Setting up the guitar is about creating the optimal distance between the strings which ar always straight. and the frets or other guitar parts. You want the strings close enough to the frets for easy playing, but not to close to avoid buzzing. You also want that distance to remain consistent between the different strings and since the frets have the same radius as the neck, you want the same distance to also be maintained by the strings which means the string will inherit the same curvature, both a nut side and on the bridge side. Although the height adjustment on the nut side is done very differently than the bridge side the way we use the Radius Gauge is similar in principle. Usually the nut will have the grooves in the correct radius and you might only need to adjust the overall height by sanding the bottom of the nut, but if you are using a blank nut, you will need to file in every single one. On the nut side you will want to set the height of the string from the frets with a ruler or spacer starting with both E strings. After setting the high E and the Lower E string height put the radius Gauge and mark the depth for the other four strings.
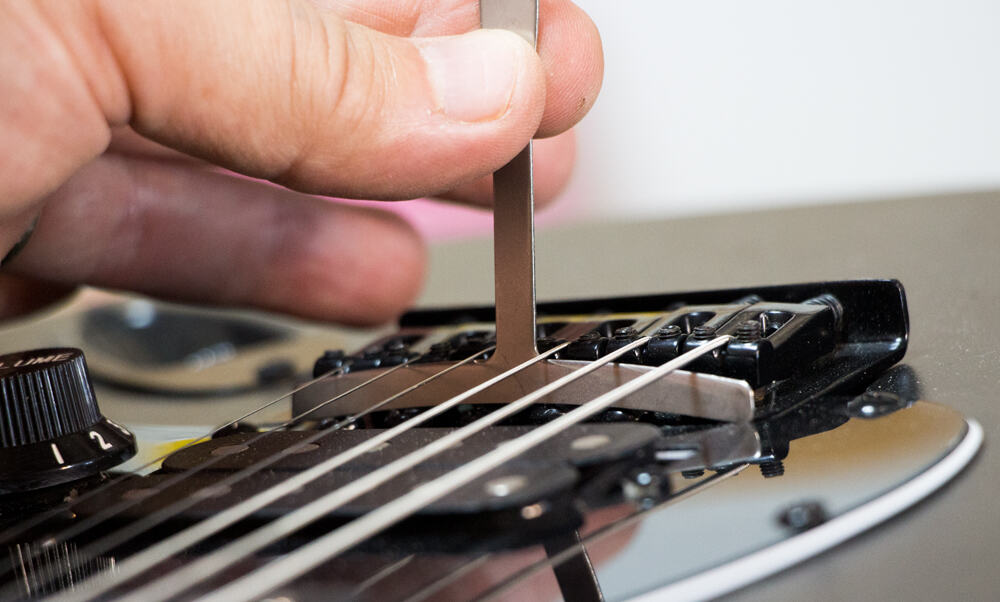
On the bridge side, while setting the action you will also want to first adjust the High E and the low E and then put the Radius Gauge above or below your strings (Depending on the type of Radius Gauge you have). If you really want to be accurate, measure only from underneath the strings. This way you don’t have to account for the changing string thickness. See where there are gaps which strings are too high and adjust each of the other four strings. If you are using and under-string Radius Gauge you can gently pull it upwards and hear it buzzing if the strings are touching it. Adjust the four middle strings until they all buzz against the gauge. Whether you have a tremolo, or a static bridge the principal is the same.
Do this before adjusting the intonation.

What types of Radius Gauges are there?
There are three common types of Radius Gauges and they usually come as a set that covers all common radiuses.
T Style – Under-string Radius Gauges
The T shaped gauge is probably the most versatile. The benefit of these Gauges is the ability to slip them under the strings to measure either the fretboard itself, or the string radius. So you can check the neck radius itself (with or without strings) or the radius of the string either from above or below. If you only get one type, this one would cover all bases.
Square Radius Guide
These usually come in stainless steel although there is a plastic and even printed out cardboard version. Each side would have a different Radius so two such cards will pretty much cover all standard guitar fingerboard radiuses. They can be used for the bare fingerboard (no strings) or for the strings themselves from the top. (although it’s preferable from the bottom)
Square slotted Radius Gauge
These are pretty much the same as the former one with the slots added to enable measuring the fingerboard without removing the strings. Handy when setting up a guitar you are not sure of. Not very comfortable to work with for setting up the string radius.
What is the significance of the radius?
The main logic behind giving the fretboard a radius is simply ergonomic. Our palm is naturally curved and therefore it makes sense that it would be more comfortable to have the fretboard round as well. The Fenders of the 50’s and 60s are known for their relatively small radius.
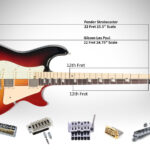
With the development of more guitars and experimentation different radiuses tended to lend themselves to different styles of playing. The consensus is that a tighter radius makes playing chords (especially full barre chords) easier, whereas a flatter fingerboard will benefit extreme string bending, and faster playing. It all makes sense in an academic way but at the end of the day it boils down to personal preferences and comfort. Today you can find anything from 7.25” on what is considered vintage necks up to 18” and even 20” loved by shredders.

Which guitars use which radius?
Let’s start at the 50’s with the most curved 7.25” Fenders. If you look at Jimi Hendrix and Earlier Eric Clapton, these are the old curvy Fenders. These were pretty standard with Fender up until the 80s when they switches to a more moderate 9.5” radius on most of their standard guitars. They still make7.25” necks, but they are now considered Vintage.
Gibson by compare cent use predominantly a 12” radius on all models so if you are a Led Zeppelin or AC-DC fan, that’s what they used.
Other manufacturers allowed themselves a wider range of radiuses, such as Santana’s 11.5” PRS (although they also made 10” radius guitars) and Ibanez who range from 12” up to 17” fingerboards. Steve Vai’s signature Ibanez JEM has a 16.9” radius to support his fast style.
What about compound radius?
In the last decade compound radius fingerboards have started becoming more popular. Compound radius guitars are trying to get the best of both worlds by incorporating the strength and comfort of tight radius with the speed and flexibility of the flatter ones.
So, what is a compound radius fretboard?
Simply speaking, a fretboard which would start at relatively smaller radius at the nut and grow to a higher radius at the bridge. For example, if we had 12” at the nut and 16” at the bridge. That would also give us 14” at fret 12 (which should be right at the middle of the scale). This way you benefit from the relative comfort and ease of playing chords and when you go up to the higher notes you can bend and shred more easily with the flatter part of your neck. If you are planning on building one, forget your radius sanding block, you are going to need something a bit more sophisticated.
Conclusion
Radius Gauges are a must have if you are doing anything from building a neck to simple guitar setup. It is a very simple but non-expendable tool and chances are you would want a couple of variations.

