

After you have built the perfect guitar setting up the action and nut height will make all the difference as far as playing comfort is concerned. Slotting the guitar nut correctly will not only make the guitar more pleasant to play, it will also improve the action and may even effect (for better) the intonation.
How do you slot the nut correctly then?
The basic idea when slotting your nut is file the slots as low as possible (or to the players personal preference) without going too low and creating any buzz. You also want to consider filing the correct width of each slot, the angle and the spacing between slots. Other factors to consider are the tools at your disposal and the type and material of the nut itself.
In this article I will go through the process and methods used for slotting files as well as cover tools, technics, tips and anything else I found may be helpful to this particular task in the guitar building process.
Let’s Start with the tools
I’ll start by saying that with a bit practice and very cautious work, slotting a guitar nut can be achieved with a single or a couple of good files, so if you are not a professional planning on building dozens of guitars and if you are already running into more expenses than planned, you can manage with just that. On the other end of the scale you can find amazing file sets designed and built for this exact purpose. ‘Good tools are an investment’ and if you subscribe to this notion you may just go and get one of those sets which may set you back upwards of $80. Here are your options:
Gauged Nut Slotting File Set
These are what the pros use. These will come with 3-8 individual files of usually double-sided files of various gauges to match the different thicknesses of strings. Obviously, you will not want the low and high E strings to have the same size slot. The variety of shapes, quality and price is very wide in this group. There are relatively simple Chinese made with a flat profiled file which can be found for around 17$ on AliExpress or Amazon and there are American Or Japanese sets with a radius file and many more increments between thickness which will be around 80$ or more. Well worth it, but expensive, especially if you are just building a single guitar or kit guitar.
Single file
One double edged single file with fairly sharp and thin tip can do the job. You will have to work much harder and be very careful not to overdo the width of the slots, but with a bit of practice, possible.
Tip: It’s not a bad idea to start with just a couple of thin enough files and practice ‘manually’ widening slots by rocking them sideways.
Saw Rod Files, Round files
These come as a set of around 15 round rods/ pins which are actually round files, they will have thickness ranging from 0.4mm to 1.6mm to match all string gauges. Personally I find them uncomfortable to work with, especially the thinner ones, they tend to bend very easily. Probably more useful if you only have very minor adjustments to make and not when fashioning a new nu from a blank. Such a set should not cost more than 10$
Filler gauge – Improvised slots
Probably something you should have laying around anyway. If you are Froogle enough (or just for the fun of it) You can take an old set and cut some teeth into it to make the profile more of a file or saw. This way you can have a file in the exact thickness you need.
Tip: Good quality nuts of exotic materials can be expensive. Get yourself a bunch of cheap plastic and ruin a few of them practicing
What are the Slots’ Positions?
If you are using a slotted nut and just making adjustments, then your spacing is already done for you. If it’s not correct, don’t try to fix it. Get a correct one or a blank nut. With a blank nut you will have to figure out the spacing and mark it yourself.
A few things to consider when working out the position of the slots:
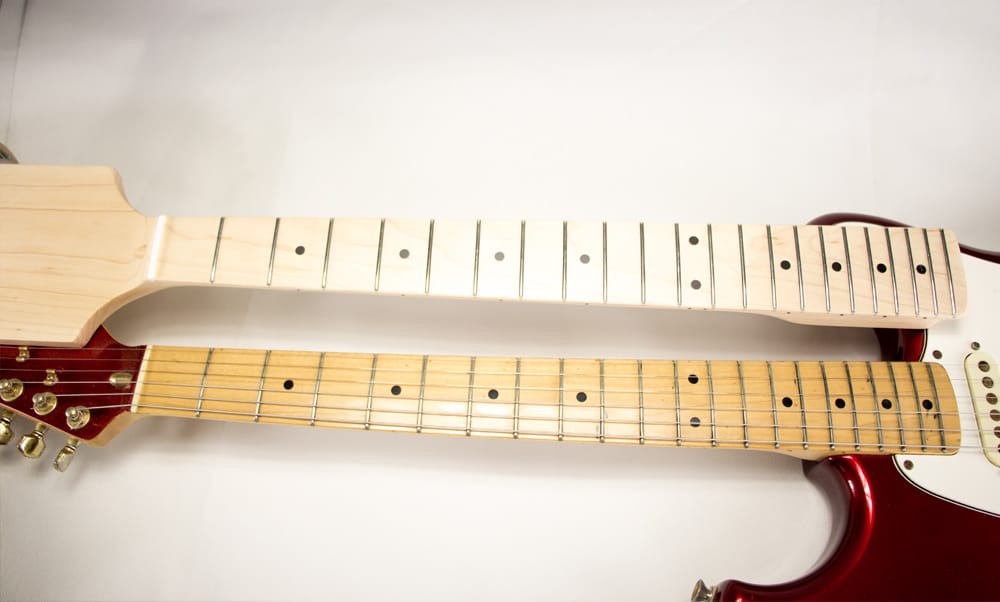
- What is your neck width? This is your starting point. If you built it you know, if you bought the neck or if it’s an existing guitar, just measure it. A good caliper will come in handy.
- You will want about 1/8” or 3mm between the E string (high and low) and the edge to allow some vibrato and bending without slipping off the fretboard.
- The spacing should be proportional and grows slightly for the thicker strings
Tip: Good quality nuts of exotic materials can be expensive. Get yourself a bunch of cheap plastic and ruin a few of them practicing
Measure and mark the positioning of the slots
After marking the two E strings by measuring from the edge, you will need to subtract the width of the four remaining strings and divide by five. This will give you the space between each of the strings, but when marking the slots, you also want to add half of the thickness of the strings on either side of the particular space. If you are going with this method, you will definitely need a calculator and a digital caliper. Personally, I think going metric at this point would make things easier, but that’s just me.
The easiest and logical to do this would just be using a spacing ruler. This ruler comes with growing proportional increments and after you have marked the two ‘E’s, you just have to slide it along the nut until you find the spot where they align and have the other four slots between them. Mark them and continue.
If you want the even easier (though more expensive) route, there is a Safe Slot Nut Guard that comes as a set with a Spacing Rule and a Neck clamp which will hold your ruler, and even enable using filler guards to show the correct height and protect the nut from cutting too deep.
Width, depth and shape
Ideally the string should be about half way deep into the slot. We don’t want the nut ‘wrapping’ around the string causing buzzing, but we don’t want the string to accidentally slip out of it’s slot when bending it. After you have finished slotting, you can take it out and sand off any access from the to so the strings are not too deep in the nut.
The width of the slot should also fit the string snugly. If it’s too loose, it may buzz.
The bottom of the slot should be radiused to match the profile of the string. The really good slotting files come with the correct radius if you picked the correct gauge file. With the rest of the files, more attention will be necessary when filing.
File at an Angle
Always make sure to file in a bit of an angle so the string is not just sitting on a flat slot. Just like the string leaving the bridge has a bit of a break angle so does it need to have a slight angle when leaving the nut. In other words, the highest point of the nut slot is the one closest to the fingerboard so the break point is right at the tip. You can use the same angle the strings take on their way to the machine-heads. This way the intonation will be consistent with the scale and the other frets.
Nut materials
As with any part of the guitar the material used will have some effect on the final tone. How much exactly is hard to say and is a matter of the materials, ear sensitivity and personal preference. Obviously, this is felt most with open string playing
As with any other parts the general rule of thumb is that softer materials will give you a warmer sound and the harder ones a brighter chime like feeling. Sustain will also be lower the softer the material is.
Another consideration is self-lubricating properties of some of the materials which will help with tuning stability, although that can also be helped with added lubrication of sorts.
Metals, Graphite, Graphtec and Corian tend to be very consistent in their behavior, whereas bone which or ebony is a natural material my have variations.
Graphite, bone and ebony are softer and will not have the bright sound of a metal nut, but a warmer tone.
Brass or other metal nuts will give a more consistent bright tone like the frets themselves and will also give better sustain.
Steps to take when slotting the nut
Before stringing the guitar mark the maximum depth of the slots. This means marking the height of the frets themselves. Not everyone does this, but it’s a good habit and will give a better sense of where you are going if you are not experienced. There are two methods to do this:
Marking the depth with the ‘Half Pencil Method’
A nice way to mark the exact height of the frets (assuming they are already nice and level) is with a pencil which was scraped, sanded or planed to almost half so the led is showing. This way if you lay it led side down on your frets and push the tip towards the nut, it will mark the exact height of the frets on the front of the nut. You may want to add a 0.01” to the actual height of the slot, but you definitely do not want to go under it.
Using filler gauges when filing
Another method of making sure you don’t run the slots two deep is stacking filler gauges next to the fret to the desired height. Then slip them to the nut and hold them back with an elastic band to keep them in place and also match the fretboard radius. If you have the ‘Safe Slot Nut Guard’ this is the place to use it.
After stringing the guitar or if you are just adjusting a stringed guitar.
Have the guitar with strings in tension. They don’t have to be fine-tuned but enough to hear there is no buzz.
Set your action to roughly the correct height. This means adjusting the truss rod and relief if needed and the bridge/ saddles enough to get good feedback around the first fret. You may want to fine tune the action after the nut slotting.
Move each string sideways from its slot, file it a little, move it back to place and check the height and repeat until you get to the right height. If you marked it in advance, you can file almost all the way and then check. You never want to go too far and start buzzing on the first fret.
How deep should I file?
There a few theories and methods to determining the height of the open string.
Measuring. For some of us using a filler gauge is the preferred method. In this case 0.001” or 0.25mm is a good place to start.
Another measuring method is using old strings. Cut and bend an old string to use as a guide. Use the them respectively to the correct thickness.
The last method, used by experienced luthiers is the feel and touch method. Press on the string to feel and see if the distance at the first fret feels right. For most players that would be the ultimate test. The lower and closer to the fret, the more comfortable and effortless playing would be.
How should I hold the file?
Since we want the fretboard side to be the highest, we will always hold the file at a bit of an angle down towards the headstock. Something like the angle the string take after the nut. On the length side you want to keep the file straight and parallel to the strings. We don’t want to widen the front (fretboard side) of the nut slot.
If you have a guitar where the strings are flaring sideways (like the two middle ones on most Gibsons) to reach the machine-heads, you would want to widen and flare the back side of the slot to minimize the friction on the string.
Once you have gone back and forth and you are happy with the string height and position and there is no buzz, you can take the nut out for final sanding and smoothing. Once the nut is ready, put a dab of wood glue (some prefer super-glue) and string it. Let it sit with the strings acting as a clamp until dry and you are done.
A few other considerations
If you plan on playing with ‘dropped D’ (or even lower) tuning, you will need to leave your bass E string a bit more height for the extra vibration it will have because it is relatively loose.
The same may be true for shorter scaled guitars like kids’ versions.
If you are using a ‘0 Fret’ than your Nut is really more of a guide and the spacing is the most (or only) important factor to the nut. It does have to be slotted lower than the Zero Fret itself but that’s about it.
What about Roller nuts and locking nuts?
Most of these have no height adjustment for individual strings and require some routing or filing to fi tin place. Since they are not adjustable it is important to check that they fit the width of the neck and the radius of your fretboard. With this type of installations the only thing controlling the height of the strings is how far we file the neck and it will take some trial and error to get it right. If you went too low you will need a shim to compensate. If you ever want to fgo back to a regular nut from the locking ones there should be no problem, except for a little height adjustment. The main problem with the roller nuts is that in order to correctly position them you would need to rout out or otherwise remove a few millimeters off of the fingerboard and if you ever choose to go back to a more conventional nut, they will be missing.