
Can I start building an electric guitar with just hand tools or is a CNC machine a Must these days? Do I need special skills or to learn how to operate dangerous power tools or can any hobbyist tackle the challenge of building it? If you are thinking about building an electric guitar, many of this question must be on your mind.
Fortunately, there are many technics, tools methods and theories around the construction of stringed instruments (Lutherie) in general, and electric guitars specifically. From the ‘old school’ Luthiers who use nothing but hand tools and produce magnificent works of art, to the most modern custom shops who may start with a 3D model and CNC their way to an almost perfect shape with great consistency and accuracy.
I have gathered those different ways and will try and lay out all your options before you so you can decide on the road you want to take into the wonderful world of guitar building. I’ll also try and offer some cheats and DIY for saving a few dollars and for fun. I mean, if you are making the instrument, why not make some of the tools as well?
(There is a more comprehensive list with images and links on the ‘Recommended Gear’ Page if you want to skip the where and why)
What do I need to know to get started?
Before we jump on the tools and machinery, you need to be realistic about your skill level at woodworking, your budget, the space you have to in.
Skill
If you have little or no experience in woodworking, this will be a serious challenge. That does not mean ‘give it up’, it just means you will have to work slower, triple check before cutting, drilling or routing and keep a large pile of scrap pieces to test on. You will also have to be extra carful as far as safety is concerned, it’s going to be hard to play that guitar if you’re missing fingers…
As far as the average woodworking hobbyist, this should be a great project to take on. A lot of parts a long the way will be quite familiar but you will still have your share of challenges. If you are more accustomed to garden type of carpentry, accuracy may be something to focus on.
Hobbyist Disclaimer: This article is aimed at the hobbyist guitar builder in mind. Those of us who will build something between one to four guitars in their life. If you are building a guitar kit, you will probably not be needing most of the tools. On the other end of the spectrum, if you want to become a pro, don’t snub me for rounding corners and allowing the armatures have some fun too.
Budget
You can make do with very little but at some point, this will affect the quality of the job. If we are going to the budget end of things, you can get most of the hand tools, and even most specialty tools from cheaper far east manufacturers. Some of them are pure crap (sorry to say), but a lot of them, although definitely lower quality and finish, will still get the job done. Naturally if you want to invest in top of the line tools and gadgets, the sky is limit.
Space
You do need a decent space to work in, and before you roll in an industrial size belt sander, consider it. There is going to be a lot of dust and wood chips, so a living room might not be the best option. Paint is also going to be a problem.

The Enticing Power of Power Tools
As I mentioned before everything CAN be done manually, it has been done that way for a long time, but unless you really want to do it manually for some principal (which is totally fine), basic power tools will make life much easier and are not really considered a luxury today.
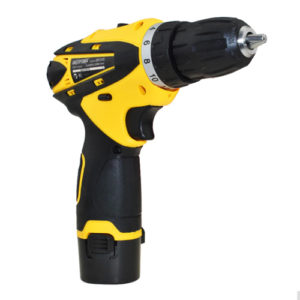
A Drill.
Pretty basic. You will need to drill quit a few holes during the building process. A hand drill will do just fine in most cases. A Press drill is preferable in many cases but you can get away with a simple and drill and a steady hand.
Cheat: If you take a square block of about 1.5” and cut a quarter of it out to get 1.5” L shape, you can use the inner corner as a guide for Vertical drilling
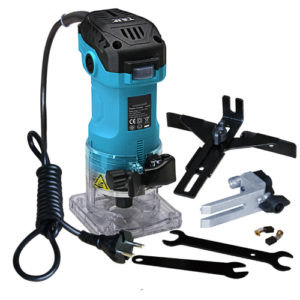
A router.
Probably the Luthiers best friend. It rounds and bevels edges, creates cavities and much more. You can do it all with planes, chisels, grinders scrapers and sanding paper but the amount of work, accuracy and ease doesn’t seem to be worth it for most people. This is also one to be carful with. Routers are the fastest spinning power tools and it has a very sharp edge. Care should be taken every time you press it, it has a kick, and when you put it down. The smaller ones are actually safer and more convenient for most guitar related jobs.
Sanders
Sanding is a big part of guitar making, nobody wants to play on a rough guitar, and if you want that shiny finish, get ready for some serious sanding. For most people it’s a chore and any motorized help is greatly appreciated.
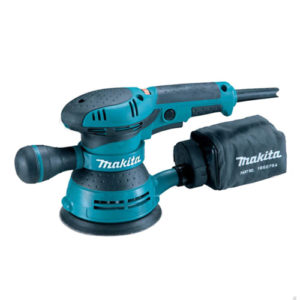
Random Orbit Sander.
Get one that is not too heavy and it will take care of a most of your sanding needs. I’ll go into sanding paper grits later.
Table Spindle Sander.
That would be a step up and would be useful for all the inner rounded areas and parts you can’t reach with flat sander, and off course the circumference of the body.
Belt Sander or a Disc Sander.
A great time saver for specific jobs, will give a larger, more consistent sanding area and will always stay flat.
A Band Saw.
For roughing out most of the major and some of the smaller shapes of the build.
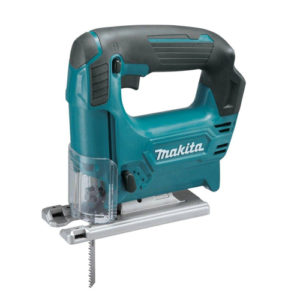
Jig saw.
A poor man’s Band Saw. Acts as a good substitute but just gives a rougher cut, meaning there will be more planing, and grinding to do.
A Benchtop Planer and/or Jointer.
When you need a totally flat or square angle, there is no better and faster way to get there. If you have never used a Jointer, be extra careful and do ask for guidance before you start it. I can hurt you in more ways than you expect.
A drum sander.
Sanding a flat surface and keeping absolutely flat is fast and easy with the drum Sander. A Random Orbis Sander can suffice.
To sum it up for the power tools, I would say that a Drill, a Router and a Random Orbis Sander are the essentials. If you have, can afford or manage to get the others, all the better. I am sure for a lot of us, a guitar building project would just be an excellent excuse to upgrade the workshop with one or more of these machines.
Let’s break it down – Which tool do we need when
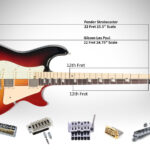
There are different sets of tools used in different parts and stages of the building process, this also depends on the style and design of the guitar you are aiming for. The Gibson headstock is very different from the Fender Style, do you have Bindings? are the pickups mounted on a pickguard? is it a Tremolo bridge? Etc. I broke it down a to every step of the process, with variations for different methods, styles and budgets.
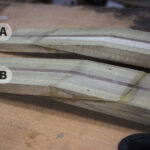
The Body
A good planer (Electric or Manual):
Chances are, whichever style of guitar and neck you are going for, you will have at least two pieces of wood to be glued together. For the whole body not to be crooked you will need the edges that are being glued together to be exactly square. You can achieve this easily with a table planer and a guide or manually with a plane and a square ruler.
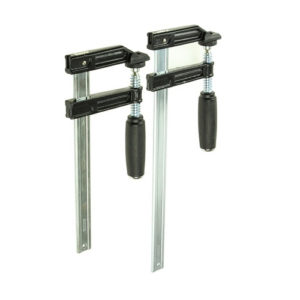
Clamps.
Ask any woodworker and they’ll tell you:” You can never have too many clamps”. All shapes and sizes are useful. For gluing the body you’ll want at least three or four large enough clamps for the width of the body. If you are also gluing a top for the body you will want at least six or eight (a dozen is better) and maybe more if it’s not flat.
Band saw or Jig-Saw.
At this point you want to give the body it’s shape. Unless you are going ‘free style’ you are either using a drawing you will attach to your blank body or a template. In both cases you will first want to rough out the shape as close as possible, so the cleanup will be easier.
Router.
If you have a template (Highly recommended) this is where the router shines. If not you can free-hand it. Trace the outline of the shape, and then empty the cavities for the pickups, the knobs and switches, the neck and any cavities your design requires. If you want to round or bevel the edges or make a groove for Bindings, that would be the tool.
Router Bits.
The versatility of your router depends on the bits you have. Good quality Bits can be pricy but there are more affordable ones as well.
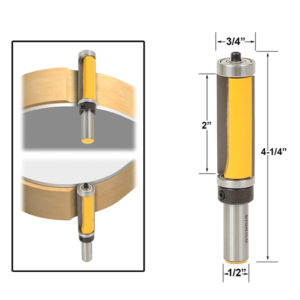
Flush Trim Bit (Template copier)
If you have invested the time or money in a good template, this little bit will make life very easy and give you very accurate results. Some have the bearing wheel on the top, some on the bottom and some have both.
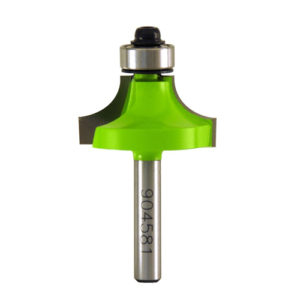
‘Chamfer’ or ‘Round-over’ Bit
Will save you a lot of time grinding, filing and sanding and give a consistent edge in minutes.
‘Straight Carbide Tipped’
Comes in different sizes. Even with a Template you may need a small diameter bit for some tight corners the (TK) couldn’t reach. With no template you will need it for all the cavities. If you are using jigs for planing the body or neck, this is your bit as well.
Drill.
Other than the obvious holes for screws knobs or other round parts. The diameter sizes you need depend on the design and the parts you are using. The less common ones:
1”or 1.5” Self-Feeding Drill Bit .
A good Bit for starting your cavity routing. (You can carefully use the cheaper Spade Bit but they tend to rip the edges.) They are also great, even more with a press drill, for removing bigger chunks before refining with the router.
A long wood drill bit.
For most designs you will have to run some wiring from the pickups to another cavity and the only way to get in there is with an exceptionally long Drill Bit.

Let’s Get in Shape
Shaping tools. Strats and Ibanez have the Arm Rest and Belly Cut, Gibsons have the bevels for the SG and the sculpted top on Les Pauls. Whichever style you go for, chances are you will need to take some wood off in places the router would not be ideal. You can use any combination of the tools below to achieve that, it’s a matter of personal preference and what’s available to you. I’ll go from rough to fine
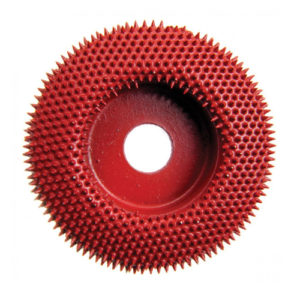
Angle Grinder with a Rasp disc.
This one will take a lot of wood off fast. Does demand respect and caution. A bit of overkill in my opinion
Random Orbit Sander.
With a 40 or 60 grit can give you similar results. Not as fast but not as violent.
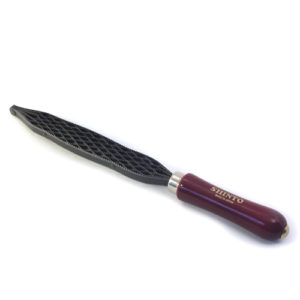
Saw Rasp.
There are some really good ones (Japanese) and they will work wonderfully as well, just take a bit longer.
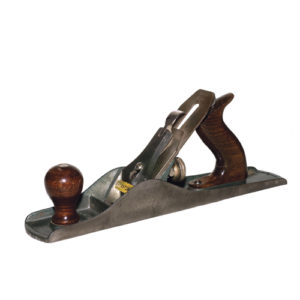
Planes:
A good sharp plane is wonderful tool to have and master (Luthiers choice for a range of tasks). You can really shave off a lot of material quickly. They will also leave a much smother surface and save you time and effort on the sanding. Planes come in all shapes and sizes and are as versatile as you make them.
‘Standard’ Plane.
Available at most hardware stores.
Tiny Planes.
For those delicate places
Files.
Somewhere between the grinding and the sanding. The round or half round ones may be useful here. More on files when we get to the frets.
Sanding Paper.
You will need a wide range of grits. Without diving too deep into sanding, the general idea is to start rough and slowly go up to finer and finer grit, each time smoothing the rougher scratches of the previous one only to make finer ones for the next one to remove. You have to step up in grit in small e enough increments to be effective. Jumping from a 100 to a 1000 will not be practical or effective, the 100 scratches are too deep for the 1000. Depending how fine and shiny you want your surface to be you will need sanding paper starting at 100 grit (less is for shaping more than smoothing) and going up to 2000. Some go even Higher. These can be sandpaper sheets or the ones the fit the sander.
Wet and Dry sanding paper.
When you get to four-digit grit you may also need the wet variation.
Sanding blocks.
They are smoother, Stronger and have more contact are than your hands.
Spray Paint.
Unless you are going for an oil satin finish, you are going to be layering a few good layers of paint and/ or lacquer. By far
the most professional results will be achieved with a compressor and a good quality spray gun. There are also some electrical hand held Guns which will give good results for a fraction of the cost.
Spray Cans.
There are some designated paints and in many cases careful work with generic ones can give more than decent results.
Tip: Spray cans will give smoother spread and smaller paint drops when heated. Just drop the can in warm water before use. Don’t over heat it, it’s a compressed can and may blow in high temperatures.
Buffing Pad.
If you want that mirror like shine you will have to buff your guitar on top of the very fine wet sanding. Look for a buffer pad that fits your Random Orbit Sander.
The neck
Much like the body, as far as cutting shaping, and smoothing, the same tools will be used. Even if going for a laminated neck, it’s still cutting, planing, gluing and shaping.
Hand saw.
If no Band Saw is available and you are building a ‘Scarf Joint’ for the headstock, a good hand saw is often a better choice than a Jig Saw.
Router.
The groove for the Truss Rod needs to be routed out. A thin Chisel can also handle the job.
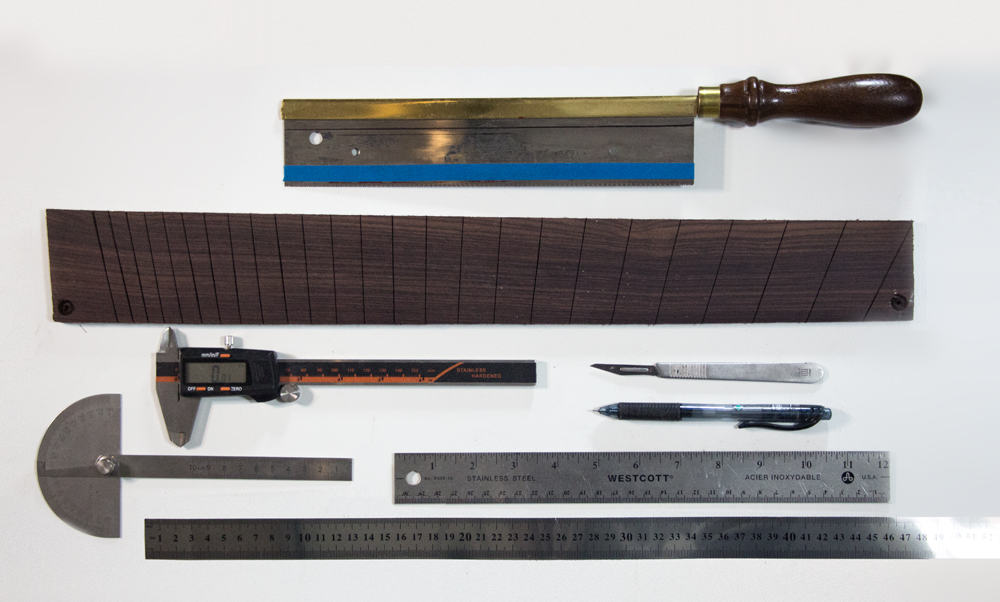
The fretboard
This is where a few specialty tools, you will not find in the average workshop, are a must
A radius sanding Block.
Fretboards come in different radiuses to better conform to our hand. When sanding it one should not use a Flat Block
Radius Gauge.
To check you’ve actually reached the desired radius
Tip: There are two types of Radius Gauges: T shaped and square ones. The T shaped ones are more versatile as you can slip them under the strings and check the radius accurately without removing the strings.

Fret Bending Jig.
The fret wire will need to be bent to the matching radius (or slightly more) for better fit in the fretboard.
Fret Cutter.
A cutter with a fine edge and tip to cut close to the board and not deform the fret itself.
Fret Tang Cutter.
To get that crown all the way to the end without the Tang showing on the side of the fretboard.
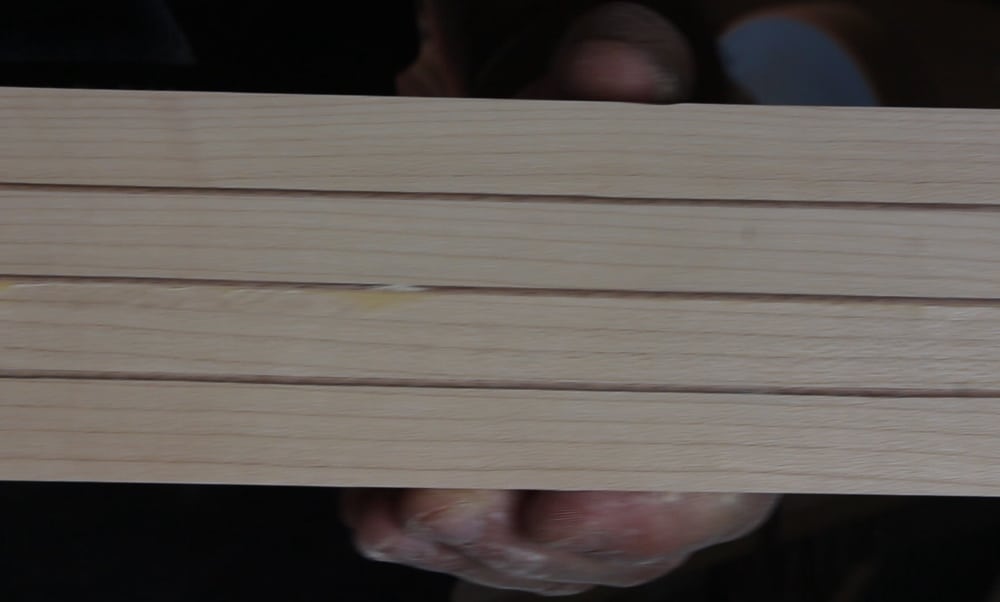
Fret Slotting Saw.
A sharp saw with thickness to match the frets’ tang -Kerf
Fret slotting Jig.
They are usually expensive, but will make life easier. This is the one place accuracy is a must
Fret Hammer.
The manual ‘old school’ method of inserting the frets to the board. Any small hammer will do but a material softer than the frets is preferable. Brass or Plastic will do the job.
A fret Press.
A more accurate and even method.
Cheat: Get the Fret press caul. It’s part of the press (although sold separately as well) but can be used manually or with a drill press.
Fret angle file.
The tips of the frets need to be filed at an angle as to not cut the guitarists fingers when sliding on the neck.

Fret Rocker.
Rock it in three location on every three fret to find out all the inconsistencies in fret height
Fret Leveling Beam.
A very straight beam with a file or sanding paper, to sand the frets to perfect height.
Cheat: I found some scrap pieces of Aluminum profile and used an adhesive Sandpaper. You can use an old level as well, as long as it flat and straight.
Re-crowning file.
After leveling the frets, some of the (the ones who were too high) will have been flattened on top and need to be rounded again, Re-crowned.
Files.
A good set of small files will be handy as an addition or substitute to the fret crowning file. Some people, myself included, don’t like the re-crowning files as they obscure the fret and you can’t see what you are doing. Also handy if you want to further round the tips of the frets.
Tip: File/ sand off one the side of the file till it’s totally smooth. This way it will not scratch the fretboard surface when running along the fret. I’d still use masking tape.
Steel Wool.
To give the frets the final sand/polish
Tip: When working with Steel Wool, make sure to mask the Pickups, the magnets love the steel dust.
Fret Eraser.
These erasers have a very fine grit embedded in the rubber and also give a final touch to the filing. Interchangeable with the Steel wool.
Polish compound.
If the wool or Eraser did not give you the shiny mirror finish you want a metal polish paste with some manual buffing will do the job.
Nut Slotting Files.
Since each string has different thickness there is six file set to match. Some manage with just one.
Pickups and electronics
Solder Iron.
You are going to need a decent Solder Iron and accessories such as Flux paste/ liquid and Solder Wire.
Strings and setup
Hex Key or screwdriver to match the Truss Rod.
You will probably want to give the neck a slight bow
Small Hex Key or Screwdriver to adjust the bridge or saddles.
Those will need to be adjusted to the radius of the fretboard and as low as possible without Buzzing
String Winder/ cutter.
This string multi-tool easily winds the strings and gets rid of those pesky leftovers. It’s a handy tool, though any wire cutter will do.
String Action Ruler.
Have the actual size of your action at whichever fret you are checking.
Did we cover everything?
There are a few more less specific tools and materials you would want to have when building a guitar
Measuring tools
Metal Rulers.
Small ones are always handy but a couple of long ones (longer then your scale) are almost essential to line up the neck bridge and pickups.
Micrometer Caliber (Preferably digital).
Precision is not over-rated. Definitely needed for fretting.
Line Scriber- Wheel Marking Gauge.
A great little tool for accurately marking lines
Carpenters Glue.
For gluing the body, the neck, the fretboard and any two pieces of wood that need joining.
Super glue.
Keep the frets in place, glue the nut and all those dots and inlays.
Masking Tape.
Protect any part close to where you are sanding, filling or drilling. Mostly the neck when re-crowning and polishing, and when Painting
Double sided Tape.
Very handy to hold templates in place when routing.
Here is one guy who went all Manual.
You’ve got to hand it to him, he works those tools like a boss.
Warning: I couldn’t get my eyes off of it.