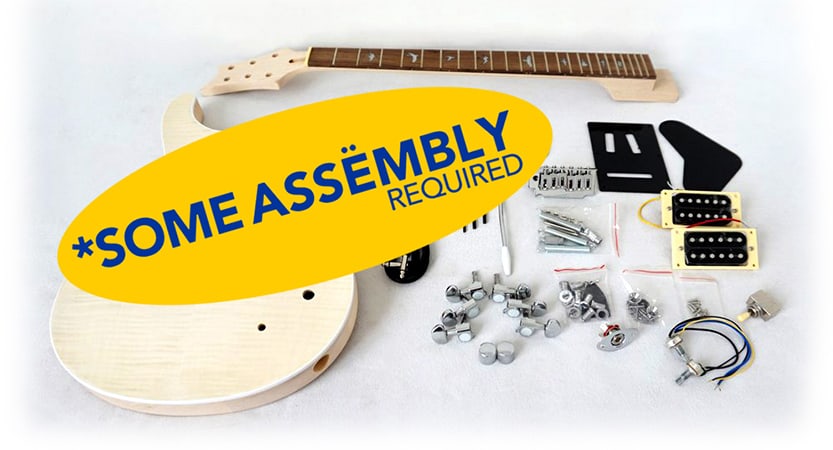


When approaching a project such as electric guitar there are a few tools which make a big difference in the quality and speed of your work. The router is definitely one of those tools and one of the router bits which can make the biggest difference is the Flush Trim Router Bit AKA Template Copier
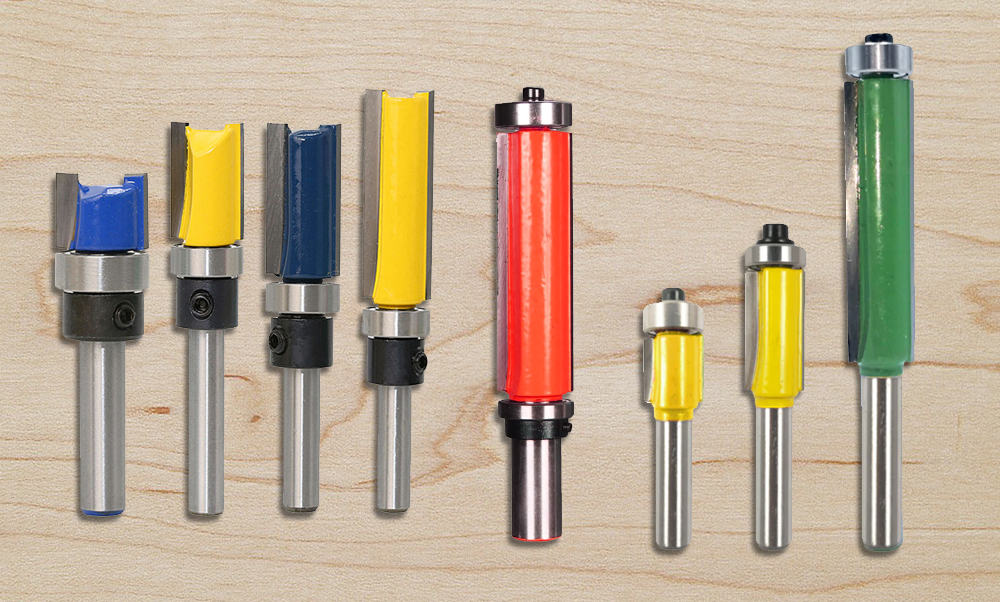
There are three main types of flush trim router bits, which are used in slightly different ways and can be right for different occasions. They all consist of a shaft, a straight blade and ball bearings. They will always have the same diameter for the bearing and the blade. They differ in the diameter of the shaft, the length of the blade, and the position and number of the bearing/s.
We’ll take a look at the different variations of these Bits and the different ways they can be used. We’ll also see how you can make the most of your Bits regardless of the quality of your router. I will also go through typical routing task when building a guitar. There are a few tricks and tips for these little blades and one use you may not have though of.
What are they good for?
The Flush Trim Router Bit as the name suggests is designed to cut an edge in the exact line or edge as an existing line or edge. Also called the template copier, it is perfect for making one or multiple copies of an object or template that has a straight enough edge.
Where is that applicable in a guitar?
Guitars, and especially if you are following an existing design, will often use templates for both the shape of the body and the neck. Using a Flush Trim Bit with a template will insure you get the exact same shape every time.
On top of duplicating the outline of the guitar body, Neck and headstock these bits can be usfull for carving out the cavities used for the guitar pickups, electronics, control knobs, tremolo bridges and the neck slot
The anatomy of a Flush Trim Router Bit
There are three main parts to Flush Trim Bit: The shaft, the blade and the bearing.
The Shaft
Common shaft diameters are: ¼”, 3/8” or 1/2” for the imperial measurements inclined, and 6mm, 8mm and 12mm for the metrics. Naturally you should be aware of the type your routers use and match the bits, especially when ordering online from who knows where.The Blade
The blade diameter will determine the amount of material which will be removed when routing and the minimum radius you will get in internal corners. More on blades when we mention quality and blade shapes.The blade length will determine the depth to which the route can reach. Since most routers have adjustable base plates this will usually determine the maximum depth as the thickness of the template will also give a certain tolerance. You can often run a few passes with a short blade and go deeper every time, but you can’t do a shallow rout with a long blade.
The bearing
The bearing is what makes this a ‘Flush Bit’ The bearing’s diameter must be exactly the same as the blade and provides a contact point for the template. The ball bearing also enables smooth motion along the edge while the blade does the cutting. Without the bearing this would be a regular ‘Straight Carbide Bit’. Some bits come with a double bearing for more contact surface, strength and stability.

Variations of Flush Trim Bits build
The three common variations of the bits include a bearing on the top side, bearing on the bottom side and bearing on both the top and bottom. Each one has a slightly different way of performing the same task. The router you have and the way you use it will determine which type of bit or bits you will need.
Using a Flush Trim bits with a manual router trimmer
The portable router or trimmer gives a lot of freedom and is more intuitive to use. There is a wide range of routers, starting at smaller trimmers you can practically hold with one hand (although not recommended) and up to beasty plunge routers with great speed and force. The bearing will usually be closer to the shaft and the body and the template will be on top of the routed part. This will surely be the preferred way for most people to rout cavities you have no access to from the outer side of the guitar, such as pickups, controls, tremolos and neck pockets. These cavities are usually smaller than the routers plate and therefore the router will be stable leaning on both sides of the bit while routing.
The edges of the body and neck can also be routed with a hand held router and a template but extra care is required as half of the router has no support and any tilting will result in damage to the routed part.
Using a Flush Trimmer bit on a table router
A table router will provide better stability and often more strength and speed. You can also use all three variations of bearing position, depending the direction of routing and if the template is on top or at the bottom. The only real downside is that cavities are difficult/ uncomfortable to rout on a table as you can’t see what you are doing. It is otherwise easier and safer for most routing jobs.
Improvised Table Router
When I mention a table router, it does not have to be an actual table router, but can be any router which is mounted properly upside down and provides the same capabilities. This will usually involve removing the base plate and substituting it with either a designated one, you can buy, or creating one that fits your router and table.
The bottom side bearing Bit (Bearing at the shaft side)
These are probably the most common and versatile of the flush bits.You can mount them on a table router with the template on the bottom or use a portable router trimmer and secure the template on top of the routed part. With the bearing closer to the router itself you can also use shorter bits which do not necessarily cover the whole thickness at once. When using with a hand held router, you need to maintain stability as the exposed blade can damage the wood with any hand wobble. They come at various length blade so a set will be very handy.

The top side bearing bit (Bearing at the tip)
Whether using a table router or a hand held, the template part is the one further from the router itself.
This means that that on a table you will have the guitar or neck below, and the template on top whereas on a hand-held router or trimmer the template will be at the bottom. In both cases you will need to make sure that the blade is long enough to cover all the wood needed and that the bearing is situated at the right depth to contact the template. This will need to be a blade long enough to cover the full thickness of the part you are routing and may require a strong
router. Not recommended for small trimmer routers, it may be a bit challenging, unless you leave a very, very thin amount of material to be routed when cutting on the line. With this type of router, you will have to route in one time.
The top and bottom bearing bit
This type of bit incorporates bearings at both top and bottom and with a quick change of the bit depth in the router you can switch from top bearing to a bottom bearing bit (you don’t use them both at once).
This may prove very handy when you want to change the direction of routing and not switch blades. More on routing direction in a bit. You will of course need the blade to be long enough to accommodate the full thickness of the guitar body or part you are working on.
A word of caution
Whenever I mention routers, I have to mention taking precaution and giving it the care it requires. The router is essentially a little planer with an exposed blade. It is also the fastest rotating blade you will have in your shop and can do a lot of damage very quickly. Remember to always be mindful of where it is when turning on and off, unplug it when changing bits and use protective gear. Eye protection for fast flying chips, ear protection for that high pitch roar and mouth/ nose protection for plenty of dust.

Routing in passes
If your wood is very hard, your router is not that strong or if blade is just too short (when the bearing is in the shaft side) you can always rout in several passes. You can route a part of the way and crate a sort of a step in your wood. For the next pass, you can remove the template and aim the bearing at the part you have just routed. You can even give it a slight sanding if your template had any bumps, and then continue copying that to the next pass. This is also handy in places where you want to gradually get to the full depth, such as truss rods or even pickup cavities.Routing direction
The correct direction for the router (and you)
With out getting into the whole clockwise and counterclockwise direction of the blade a very simple rule of thumb is that you should always feel resistance and feel like you are pushing the router and not being pulled by it. This is true for both table and hand held. On a table you will be holding the wood and not the router, but should also push it against resistance and NOT resist the pulling of the router.The correct direction for the wood
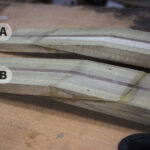
As a rule you always want to route with the grain and not against it, to prevent chipping.The softer the wood and the longer the grain this will be more critical. Ideally you will separate your routing into small parts (see image) which take the direction of the grain into account. Considering the routing direction (for the router) you may need to change blade from upper to lower bearing, and flip the guitar part as well.
This is where a table router with double bearings may be handy. The importance of this will vary with the quality of the wood, the router and the blade, but you will appreciate when a chunk of a ‘horn’ goes flying off your body…
Carefully play around with some scrap wood to have these ‘accidents’ in advance and get a feel for it.
Quality and blade shapes
Any professional who works with sharp tools, from a chef to a Luthier will tell you that dull blades give inferior results and result in more accidents. Putting the quality of the router itself aside, the blade itself can make a difference to the smoothness of the cut and the amount of chipping it may cause, just like a planer blade but with 3000 rpm. On the other hand the price of a flush trim bit can start at the single digits and end at three. A high quality, fluted bit can cost up to 200$. This type of bit will give superior results and will last for the routing of many guitars. The number, shape and material quality will dictate the price. If this is not in your budget, there are great alternatives, but your approach to working with them should be more, let’s say, forgiving. You should probably mind routing direction even more.

Do I need all types of Flush Bits?
This will depend on the router you have and the way you prefer working with it. You will always need a bit with the bearing close to the shaft for routing the cavities. You may be able to get away with it for certain type and quality and wood types, but chances are you will also need the ‘bearing at the tip’ type of bit so you can route both direction to accommodate for grain direction. If you have a good table router, bearings at both ends may be a comfortable and time saving solution. If budget is a concern’ you should experiment with a few different options, sizes and types to find the combination that best fits you. You can start with a small trimmer router that costs under a 100$ and bits that are less than 10$ and go from there.
A Few Tips for working with a router
- Get to know your router, your blade and your wood with small tests, before you jump on the guitar.
- Always begin the motion away from the wood/ blade and approach slowly.
- Check the routing direction every time, especially if you are switching from table to portable and/ or flipping the guitar and template
- Don’t try and ‘bite more than you can chew’. Tackle small sections. Less is better than too much.
- If you are not sure, STOP.
- If you feel you need to use too much force, stop and reconsider. You are either taking too much material for your blade size/ sharpness or your router is not up to it. Work slower and maybe do more passes.
- Be extra careful in thinner, more delicate places such as the headstock.
Using the flush trim router bit as a Jointer
If you don’t have a jointer but still want a straight flat edge for gluing (or anything else), just use a straight edge as a template on the material you want. Clamp it or tape it, living just a hair of the ‘almost straight’ edge and run it with the bearing along the straight edge. You can double check that the blade is actually 90 degrees if you have doubts.
What would be the ultimate combination for Flush Trim bits and routers?
If I had no budget (or space) restrictions, I would have a good table router with a 2” (or more than any guitar I would build) flush trim blade with bearings at both the top and bottom. This would cover most outer edge routing for body and neck. I would also have a medium size plunge router and bits with bearings at the shaft size. ½” and 1 ½” blades should cover it.
What other bits would you need for guitar building?
You can probably build the majority of guitars with the following bits:
- Chamfer or Round-over Bits,
- Straight Carbide Tip
- Rabbet Bit with multiple bearings